The track map dashboards contain a lot of information and are very customizable.
It is suggested that you take the time to read this entire page to get the most
out of the track map dashboards.
Track Display
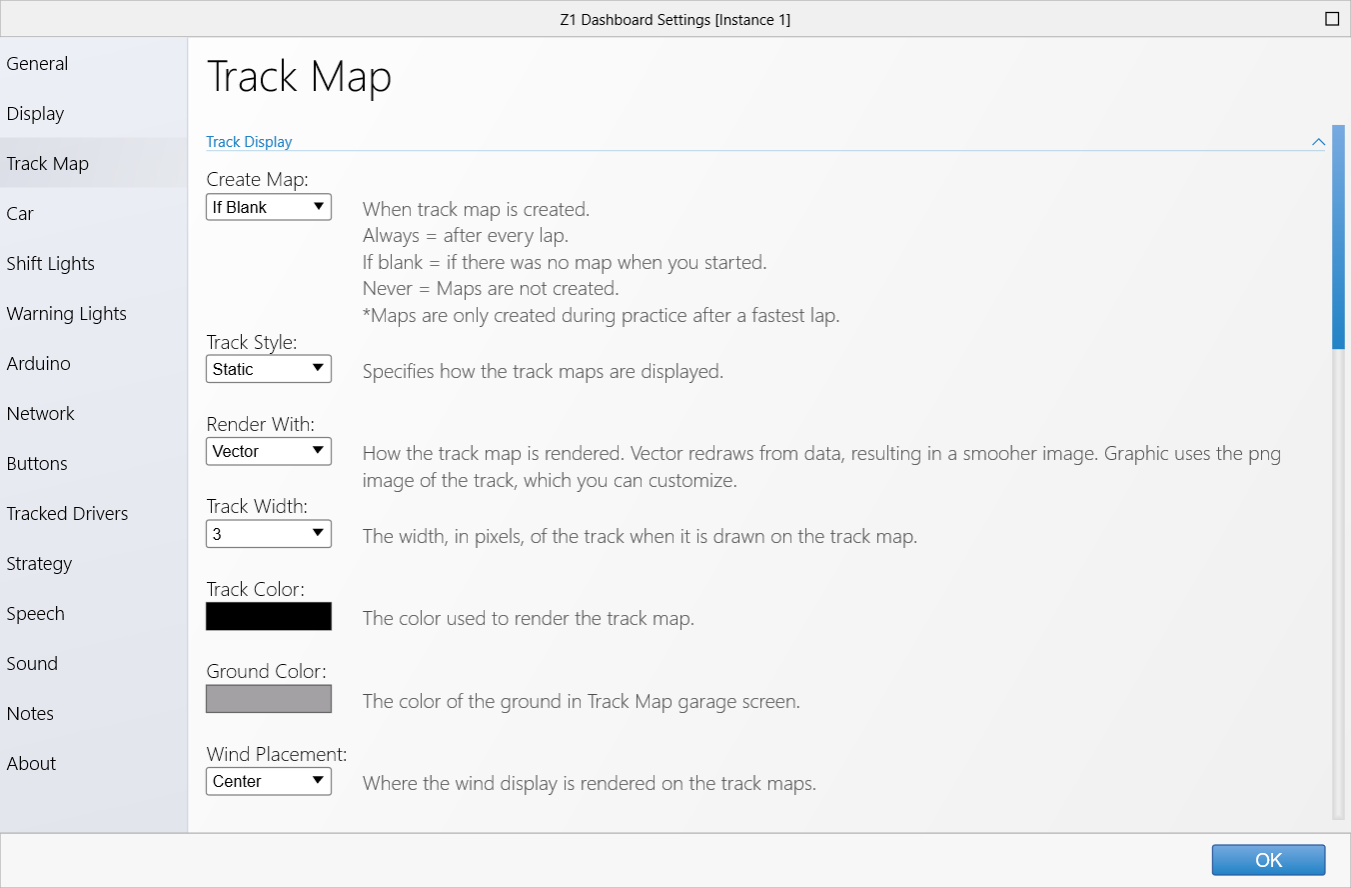 Create Map:
The Create Map drop down tells the software when to create the track map.
If Blank will
create the track map if one does not already exist when you get to the track.
Always will create
the track map regardless of whether or not one already exists.
Never will not create the track map
even if one does not exist.
Track Style:
Track maps can be either static or moving. A static track map displays the entire track map. A moving track
map displays the part of the map that is ahead of you are will move it around your car as you progress
round the ttrack.
By default static track maps are oriented with north facing upwards. You can change this by rotating the
map using the rotation circle displayed on statis track maps or when you are viewing the track map outside
of the car in the Track Map garage screen.
Render With:
The Render With option allows you to specify how the track map is drawn. Setting it to Vector will draw
the map from data points recorded when driving. Setting it to Graphic will use a pre-created graphic for
the track map. The Vector option will give cleaner images at higher resolutions. The Graphic option is
the original way the maps were drawn, with the advantage of letting you mark up the track map if desired.
Track Width:
The track width drop down determines how wide the track is when rendered.
Track Color:
The track color field shows the color used when rendering the track. Clicking on the swatch will display
a color chooser which allows you to select the desired color.
Ground Color:
This is the color to be used when rendering the ground on a 3D track map.
Wind Placement:
When possible the Z1 Dashboard will display the wind direction as an arrow and the wind speed on the
track map. You can set the location of that display by selecting one of the options here. The default
option is to place the information in the center of the map.
Sector Display
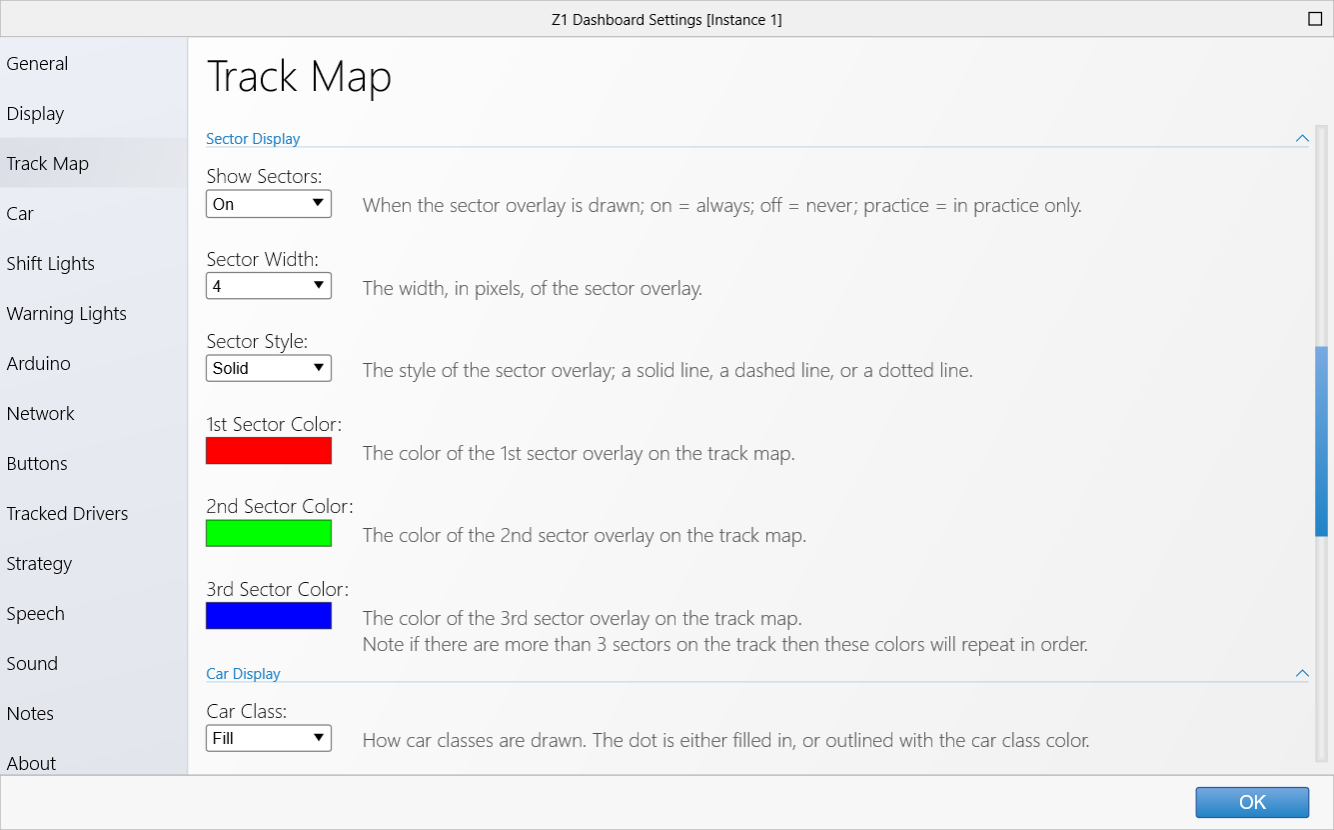 Show Sectors:
Show Sectors allows you to specify whether or not the sectors should be highlighted.
On: the sectors will always be highlighted
Off: the sectors will never be highlighted
Practice: the sectors will only be highlighted in practice sessions.
Sector Width:
The Sector Width drop down allows you to choose the width of the sector overlay when it is rendered.
Sector Style:
The Sector Style drop down allows you to choose how the sector overlay is rendered.
Solid: a single solid line
Dotted: renders the sectors as a series of individual dots. In this case the sector width option
is the radius of the dots.
Dashed: renders the sectors as a dashed line.
1st, 2nd 3rd sector colors:
These are the colors used to render the various sectors. Click on the swatch to change the color.
Note if the track contains more than 3 sectors, then the colors will rotate through these three
colors.
Car Display
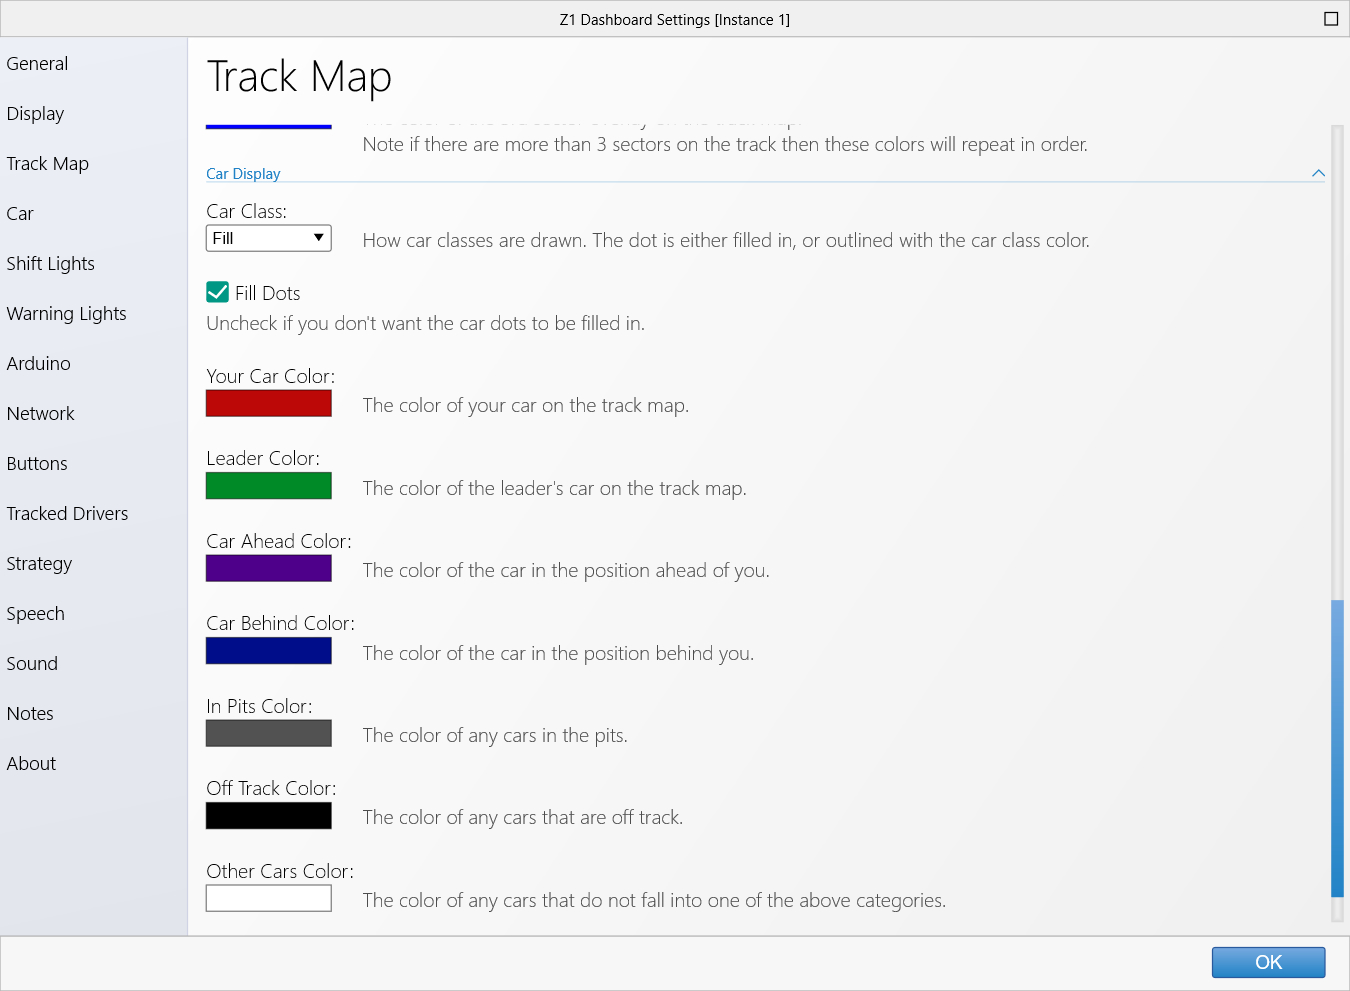 Car Class:
The Car Class drop down lets you specify how a car's class should be drawn.
Fill: this will fill the car's circle with a color representing that car's class. (The outline
will then be one of the colors below as appropriate.)
Outline: this will draw the car circle's outline with a color representing the car's class.
(The circle will then be filled with one of the colors below as appropriate.)
Car Colors:
These are the colors that will be used to render cars on the track map. Click on the swatch to
change the color.
Modifying Track Map Images
If you want to modify the track maps to include specific data, such as corner numbers,
name, etc, you can do by by editing the appropriate png image in anh image editing software.
The images are located in documents/z1dashboard/>sim</tracks.
Note you must set 'Render With' to Graphic, and you must set 'Track Style' to Static.
 Manual Index