By clicking on the settings icon at the top right of the Z1 Server screen you can access the settings dialog. The options within
the Buttons tab are explained here. The Z1 Server can transmit button presses from your wheel or button box across your network
to the Z1 Dashboard. To do so you need to assign the desired buttons to the Z1 Server as explained below.
General Options
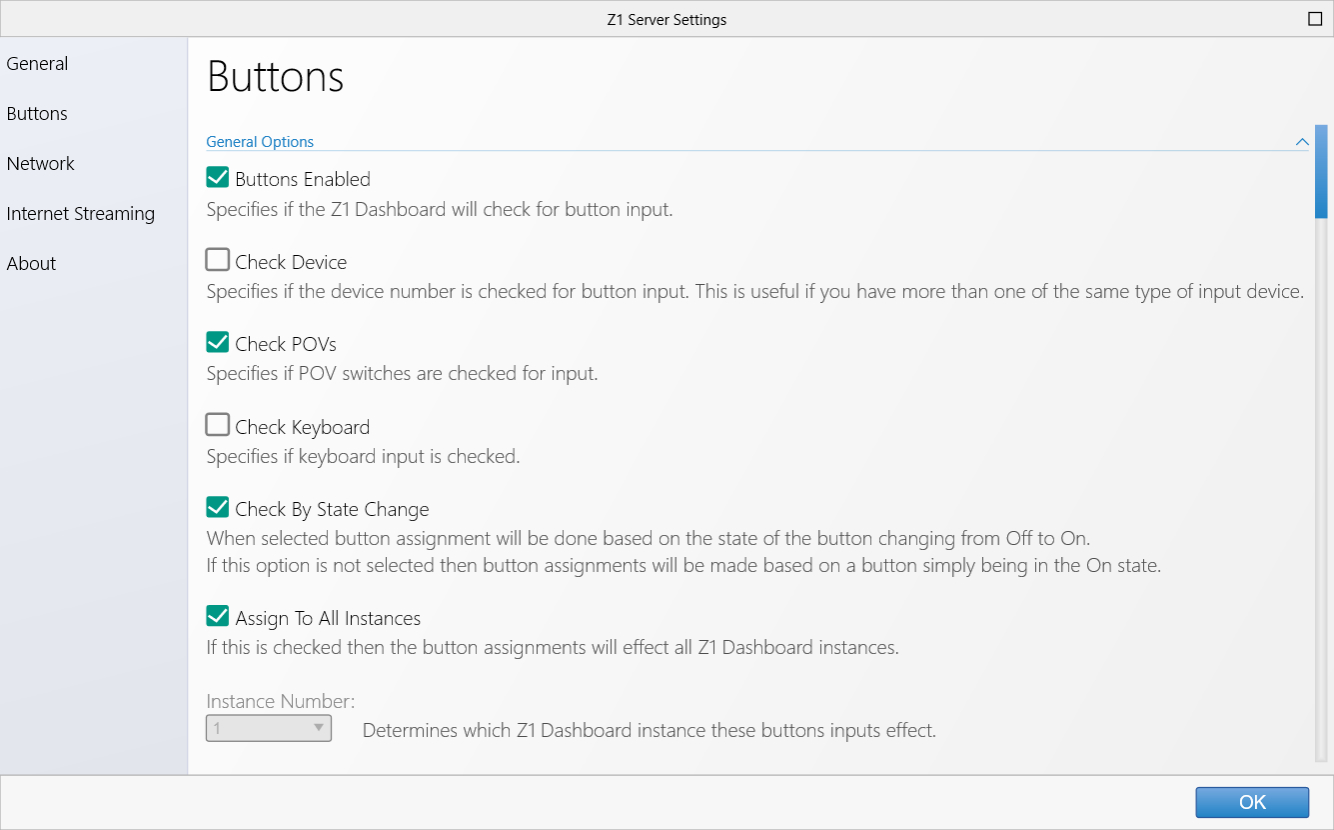 Buttons Enabled:
When selected the Z1 Dashboard will check for button/kayboard input. Note you will need to restart the Dashboard
for the change to take effect.
Check Device:
This specifies if device number is taken into account when determining if a button was clicked. If you have
multiple identical devices, such as button boxes, then turning this option on will allow the software to
differentiate between those boxes.
Check POVs:
This specified whether or not POV hat switches are checked for input. There may be cases when you do not
want the Z1 to check for those inputs. If that is true then you should turn this option off.
Check Kayboard:
This specifies if keyboard input is checked. When turned on the Dashboard will listen for any keyboard input.
If you want to use keyboard keys to trigger events, or if your button box or wheel input sends data as keyboard
input then you should enable this option.
Check By State Change:
By default buttons are detected when they are in the 'On' position. However there are some
cases when you want the button to be triggered by changing between the On and Off state.
If that is the case then enable this option.
Assign To All Instances:
When this is checked the button inputs will be broadcast to all connected instances of the Z1 Dashboard. If you want the
inputs to be sent only to a specific instance then uncheck this box.
Instance Number:
If you have unchecked the Assign To All Instances checkbox then you will need to specify which instance these buttons definitions
should be sent to. You can choose the instance number (1-6) from this drop down. Each instance can have a different set of
buttons assigned to it. This allows you to control up to 6 connected instances of the Z1 Dashboard using different button inputs.
Wait Times
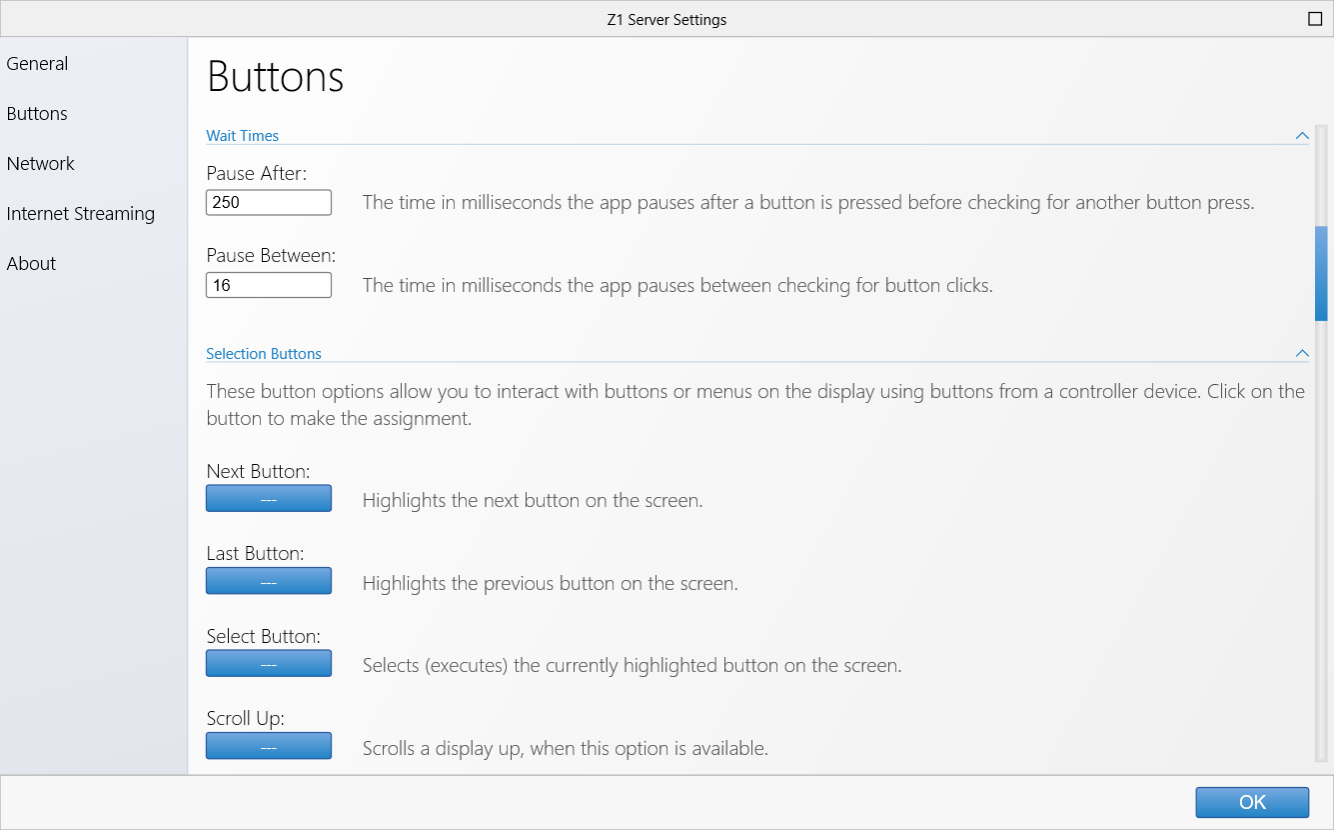 Pause After:
This is the number of milliseconds that the software will wait after receiving a button input before it will
accept another input. You can increase of decrease this value to suit your types of buttons. For example if
you are using a rotary dial, you might want to software to wait less than if you are using a push button.
The default value of 250 gives a fairly good compromise across all button types.
Pause Between:
This is the number of milliseconds that the software will wait between checking for button inputs. If you
find that button inputs are being missed you can try reducing this value. If button inputs are happening
too quickly then try a higher value.
Selection Buttons
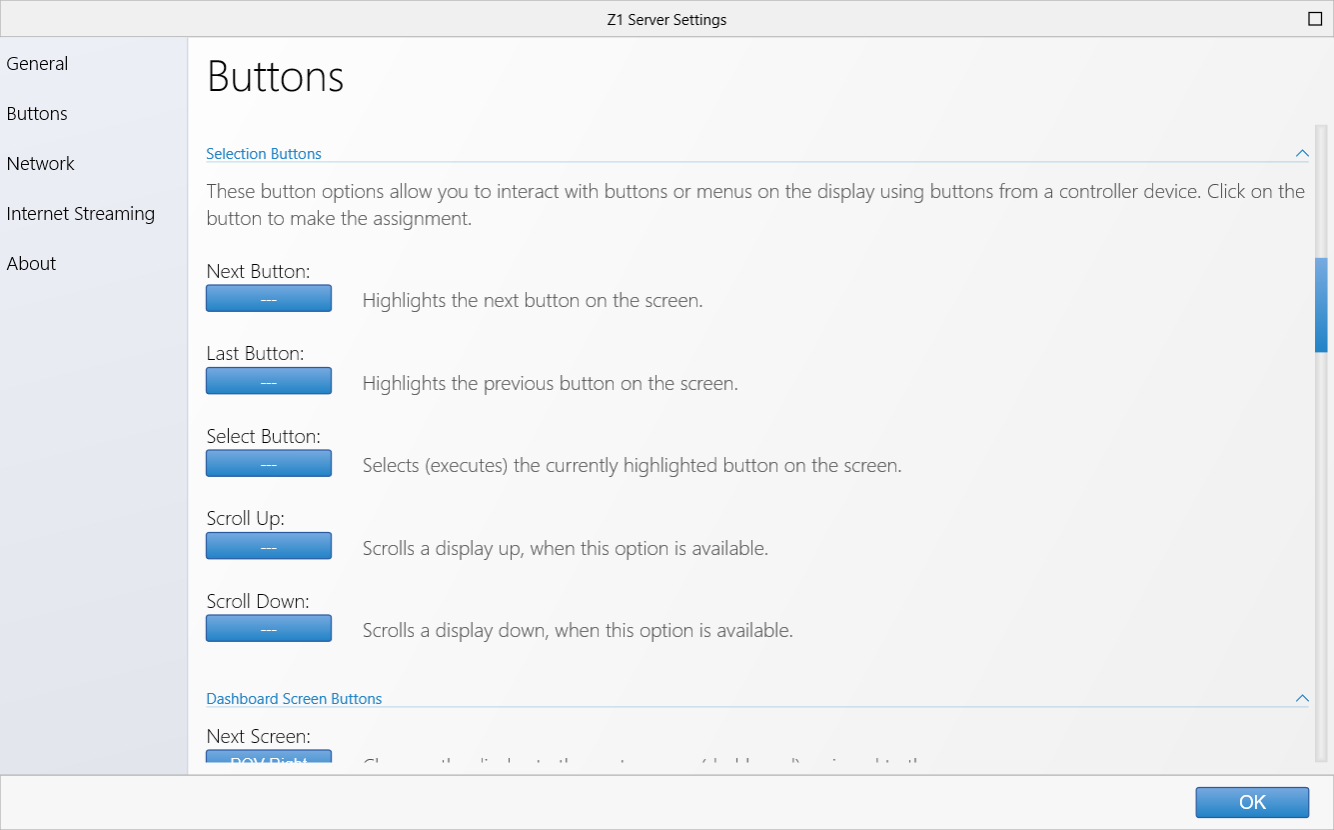 Next Button:
This is the button assignment to highlight the next button in the sequence of displayed buttons on a
particular screen.
Last Button:
This is the button assignment to highlight the previous button in the sequence of displayed buttons
on a particular screen.
Select Button:
This is the button assignment to select the currently highlighted button on a particular screen.
Scroll Up:
This is the button assignment to scroll up any windows that have up/down arrows.
Scroll Down:
This is the button assignment to scroll down any windows that have up/down arrows.
Dashboard Screen Buttons
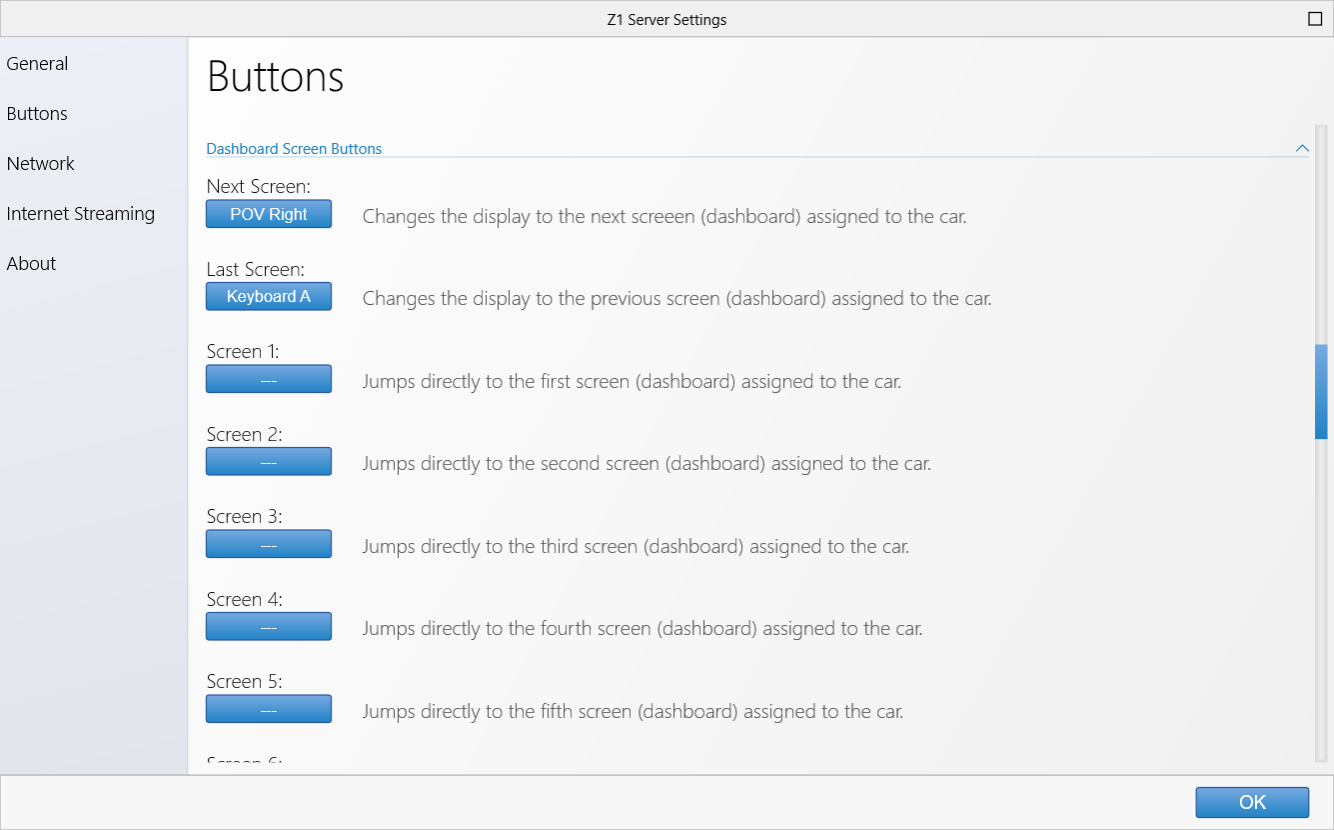
These buttons let you switch between the dashboards you have assigned to your car.
Next Screen:
This is the button assignment to display the next dashboard associated with the current car. This only
works when you are in the car.
Last Screen:
This is the button assignment to display the previous dashboard associated with the current car. This
only works when you are in the car.
Screen 1 - 10:
You can assign a specific button to jump directly to a specific screen number within your car's
dashboards. Just assign the appropriate button to the desired screen number.
Action Buttons
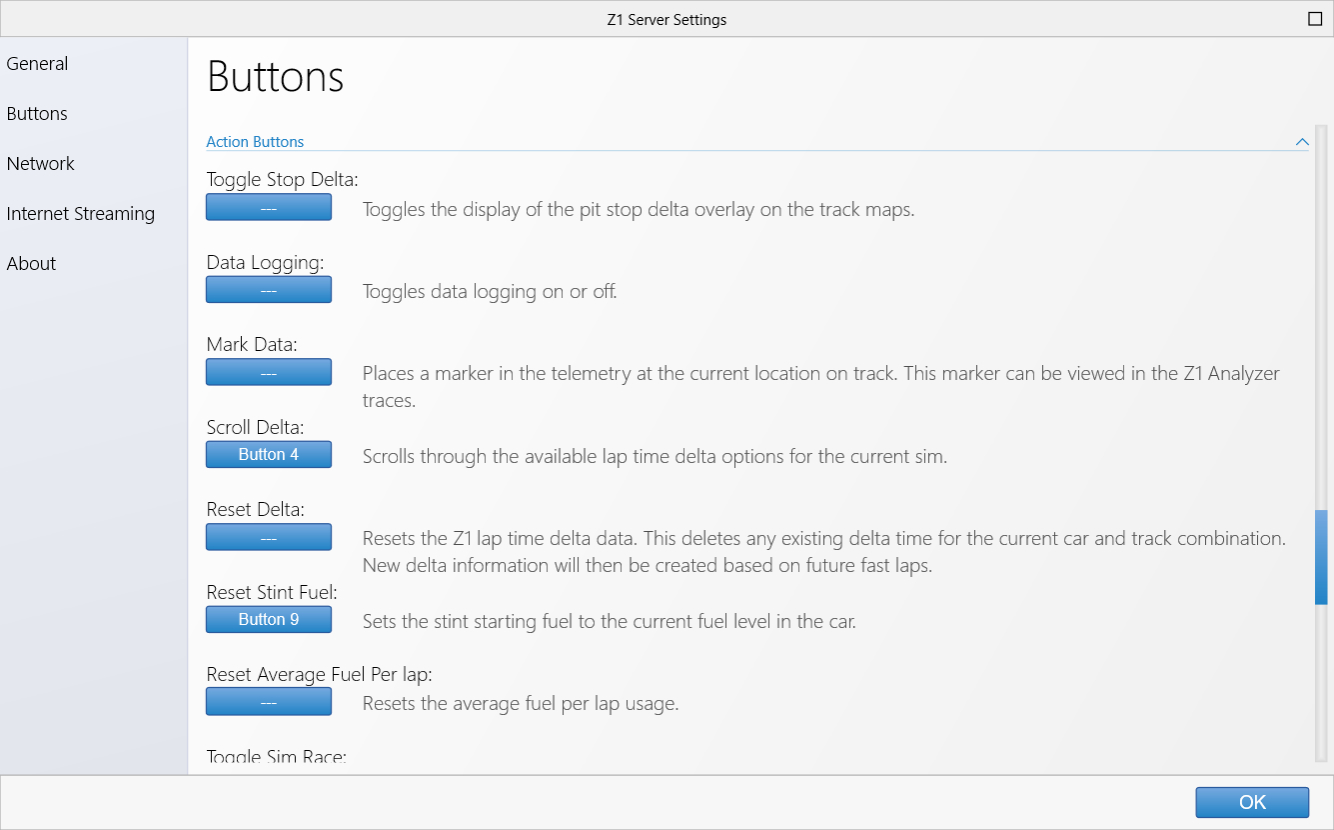 Toggle Stop Delta:
This allows you to assign a button to turn on or off the 'after stop' display on the track maps. By
default the 'after stop' display is shown when you get within a specified number of laps of your stop
(3 by default). Using this button you may turn the display on or off at any time.
Data Logging:
This is the button assignment to toggle data logging on and off. Data logging is turned on by default.
Mark Data:
This is the button assignment to insert a marker into telemetry files. Once assigned it just requires
a single push to place the marker. Holding the button down continually will place multiple markers all
in a row. This marker can be viewed in the Z1 analyzer traces.
Scroll Delta:
This is the button assignment to scroll through the various delta options for the current sim. This lets
you change the displayed delta on the fly. The Dashboard will display a message when you change the
currently selected delta.
Reset Delta:
This is the button assignment to reset the current delta. This lets you delete any saved splits for
the current car and track combination. This is useful if the weather or other changes in the track
require the delta to be reset. The Dashboard will display a message when that the delta has been reset
when this button is pressed.
Reset Stint Fuel:
This resets the stint starting fuel level to the current fuel level in the car. The stint starting fuel
level is used to determine how much fuel has been used in the current sint.
Toggle Sim Race:
Starts or Ends a simulated race in the Z1 Dashboard. See the Strategy tab in the Z1 Dashboard settings
dialog to set up a simulated race.
iRacing Specific Buttons

This section contains button actions that are specific to iRacing. If you are not connected to iRacing then
this section will be collapsed. You can open it by clicking anywhere on the blue divider.
Add Fuel:
This is the button assignment to add fuel in iRacing. This will add one liter to the amount of fuel that
will be added at your next pit stop.
Remove Fuel:
This is the button assignment to remove fuel in iRacing. This will remove one liter from the amount of
fuel that will be added at your next pit stop.
Fuel To End:
This is the button assignment to add the necessary fuel to finish the race in iRacing. This will add the
amount of fuel required to finish the race, plus the specified buffer amount (3 liters by default), at
your next pit stop. If this is more than the capacity of the fuel tank then you will get a full tank of
fuel at the next pit stop.
Clear Tires:
This is the button assignment to tell your pit crew that you do not want to change your tires at the next
pit stop.
Fast Repair:
This is the button assignment to tell your pit crew that you wish to have a fast repair at the next pit
stop instead of fixing all the damage (if any) that exists on your car.
Speech Buttons
 Say All:
This button will make the Z1 Dashboard speak all available data to you when pressed.
Lap Time:
This button will make the Z1 Dashboard speak your last lap time when pressed.
Position:
This button will make the Z1 Dashboard speak your current position when pressed.
Laps of Fuel:
This button will make the Z1 Dashboard speak the remaining laps of fuel in the car when pressed.
Lap Number:
This button will make the Z1 Dashboard speak the current lap number when pressed.
Track Driver Buttons
 Add Ahead:
This is the button assignment to tell the Z1 Dashboard that you want to add the car ahead of you on track
to your tracked driver list.
Add Behind:
This is the button assignment to tell the Z1 Dashboard that you want to add the car behind you on track
to your tracked driver list.
Cut Ahead:
This is the button assignment to tell the Z1 Dashboard that you want to remove the car ahead of you on
track from your tracked driver list.
Cut Behind:
This is the button assignment to tell the Z1 Dashboard that you want to remove the car behind you on
track from your tracked driver list.
 Manual Index