If you have a question about the Z1 software please look here as you may find your answer. Click on the question text to see each answer.
This is because the C++ redistributables did not get installed properly. Here is the solution:
1) Make sure Windows is completely up-to-date. – This is very important.
2) Go here:
https://www.microsoft.com/en-us/download/details.aspx?id=52685
3) Click on Download
4) Download both the vc_redist.x64.exe and vc_redist.x86.exe files.
5) Run both of them to make sure the redistributables were installed properly.
If the above doesn’t work, then try this:
1) Open the control panel and go to Programs and Features.
2) Select the Microsoft Visual C++ 2015 Redistributable (x64) – 14.0.23026 and uninstall it.
3) Select the Microsoft Visual C++ 2015 Redistributable (x86) – 14.0.23026 and uninstall it.
4) Go here:
https://www.microsoft.com/en-us/download/details.aspx?id=52685
5) Click on Download
6) Download both the vc_redist.x64.exe and vc_redist.x86.exe files.
7) Run both of them to make sure the redistributables were installed properly.
If you are running iRacing and the Z1 Analyzer cannot find any telemery files the first thing to do is to make sure
there are ibt files in documents/iracing/telemetry.
First make sure you have iRacing's telemetry turned on (Alt-L in the sim). The Z1 Dashboard will turn this on by default.
If you have this turned on and still do not get any ibt files then there are a few possibilities. The most common
are that you are running either VRS or JRT. Both of these applications manipulate the ibt files and can delete them
automatically. This is not good behavior as an application should not change files made by a different application,
as this means other applications won't have access to this files.
If you are running VRS or JRT we suggest either turning them off when you want to record iRacing telemetry data,
or if possible turning off the features of those applications that delete or change the ibt files.
The Z1 software requires Windows 10 or 11 desktop versions to run. So you cannot run it directly on an iPad/iPhone/Android device.
However you can stream it to a browser on your device. It will still need to be running on Windows,
but you will be able to use your tablet or phone as a display.
We highly recommend testing this setup with the Z1 software demo before purchasing to see if it works for your purposes.
1) Before you get into VR run the Z1 Dashboard as you normally would. It should be displayed on your monitor. You can run as many
instances as you like (up to 6). (Note you could do this step in VR, but we find it easier to do beforehand.)
2) Enter VR and go to the new Oculus Virtual Dash.
3) Choose to display the monitors on the Virtual Dash. This should show your monitors with the instances of the Z1 Dash that you
launched before getting into VR.
4) Drag each instance out of the monitor and into your virtual world.
5) Once you have the Z1 instance displayed where you want it, click the 'pin' icon. This is located at the bottom right of the window.
This step is critical. If you don't pin it, you won't see it when in the sim.
6) Now launch your sim. Once in the sim you should see the Z1 window where you pinned it.
Now you can enjoy all the benefits of the Z1 Dashboard while in the VR world of Oculus Rift!
Please go to the
Account page and enter your order number. You will
see an option to reset your license number in the Order Information section.
Your registration needs to be reset because either some hardware on your computer has changed or the order
number was previously used to register the software on a different computer. Please go to the
Account
page and enter your license number. You will see an option to reset your license number in the Order Information section.
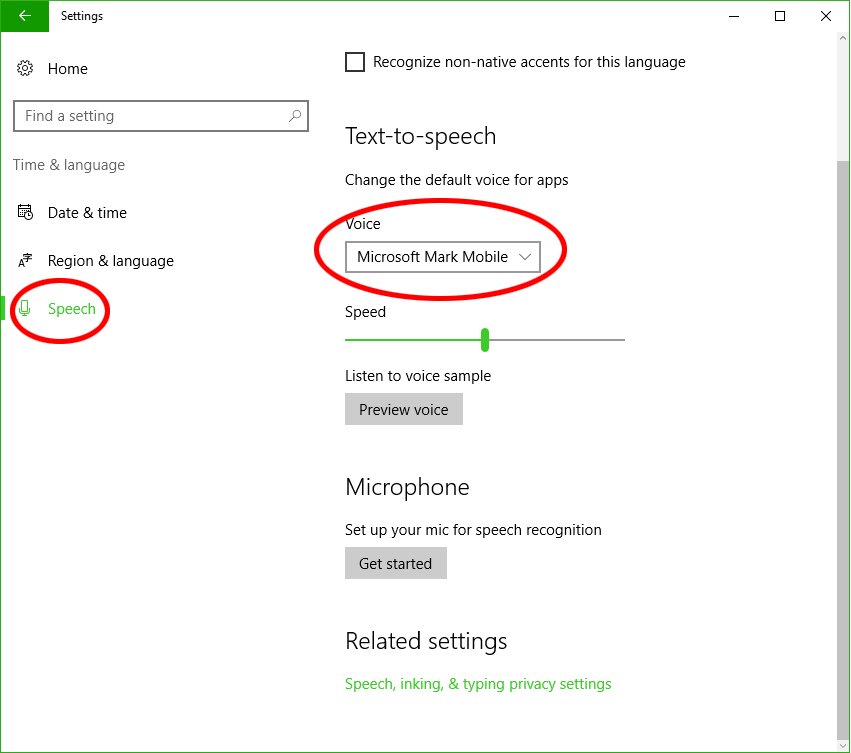
Windows 10:
1) Access Settings.
2) Open System in the settings
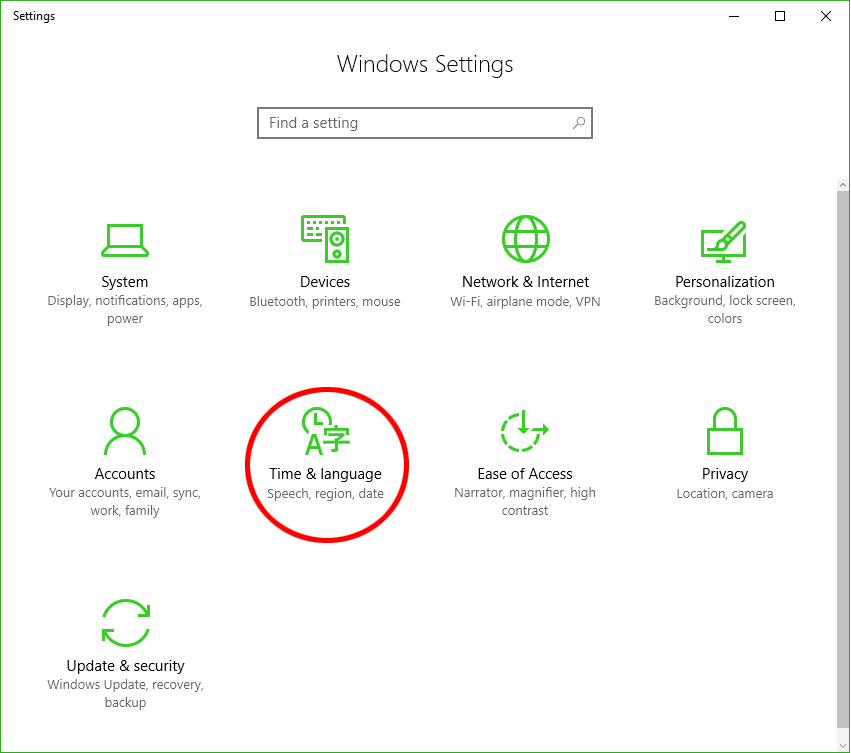
3) Choose Speech, and change voice and speed under Text-to-speech.
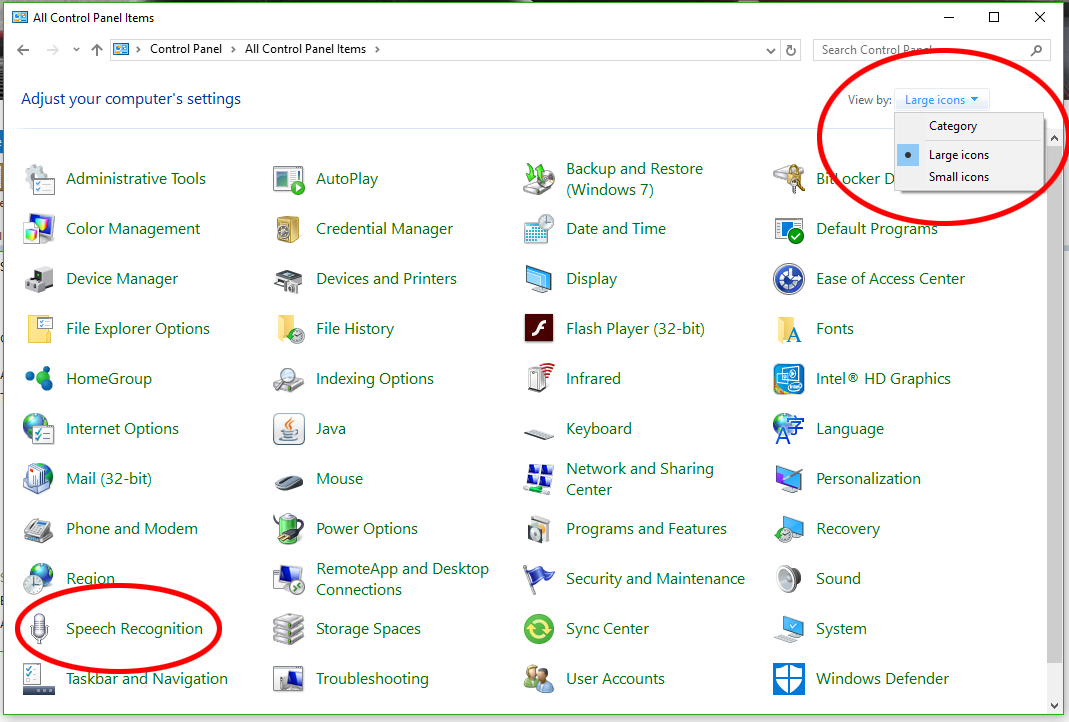
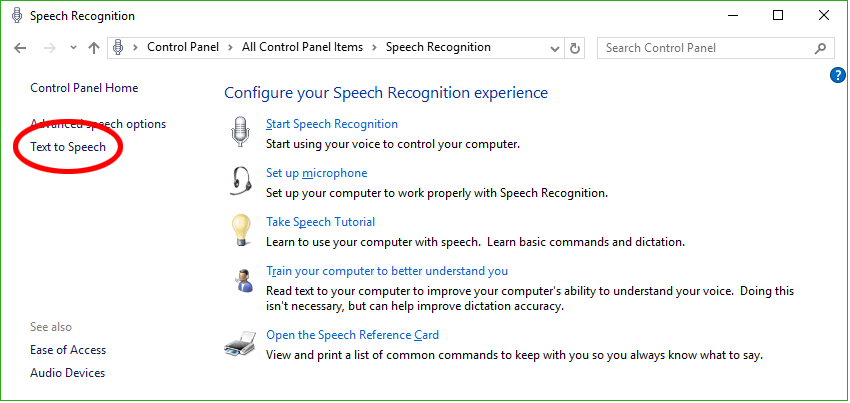
Windows 10:
1) Open the control panel, making sure you are viewing the items by Large Icons
2) Open the Speech Recognition control panel
3) Click the Text to Speech link on the left
4) Click the Advanced button
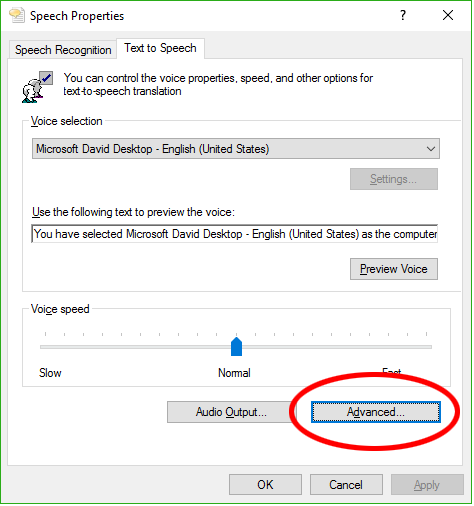
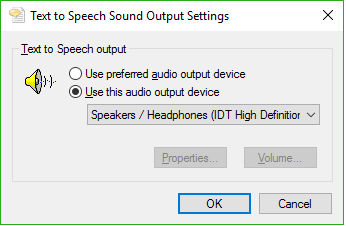
5) Click the Use this audio output device option.
6) Select the desired audio output device.
7) Click OK in each window until they are all closed.
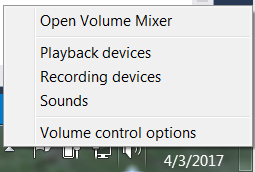
This is done through the Volume Mixer.
1) Make sure your sim is running.
2) Make sure the Z1 Dashboard is running.
3) Open the settings dialog on the Z1 Dashboard and go to the Speech tab and click the Test button.
4) Right click on the speaker icon in the Windows task bar to display the popup menu.
5) Click on the Open Volume Mixer option.
6) Set the volume level of the Z1 Dashboard to about twice that of the sim.
 Manual Index