The Z1 Dashboard software allows you to easily customize the display to suit your style. This customization is done using
the Settings Dialog, accessible by clicking the Settings Icon

while not connected to a sim, or by selecting 'Settings' from the menu when not in the car. Note that each instance of the
Z1 Dashboard software can have different settings. Changing settings for a particular instance only effects that instance.
The settings dialog contains several tabs with specific settings under each one. This page describes the Display settings tab.
Window Settings
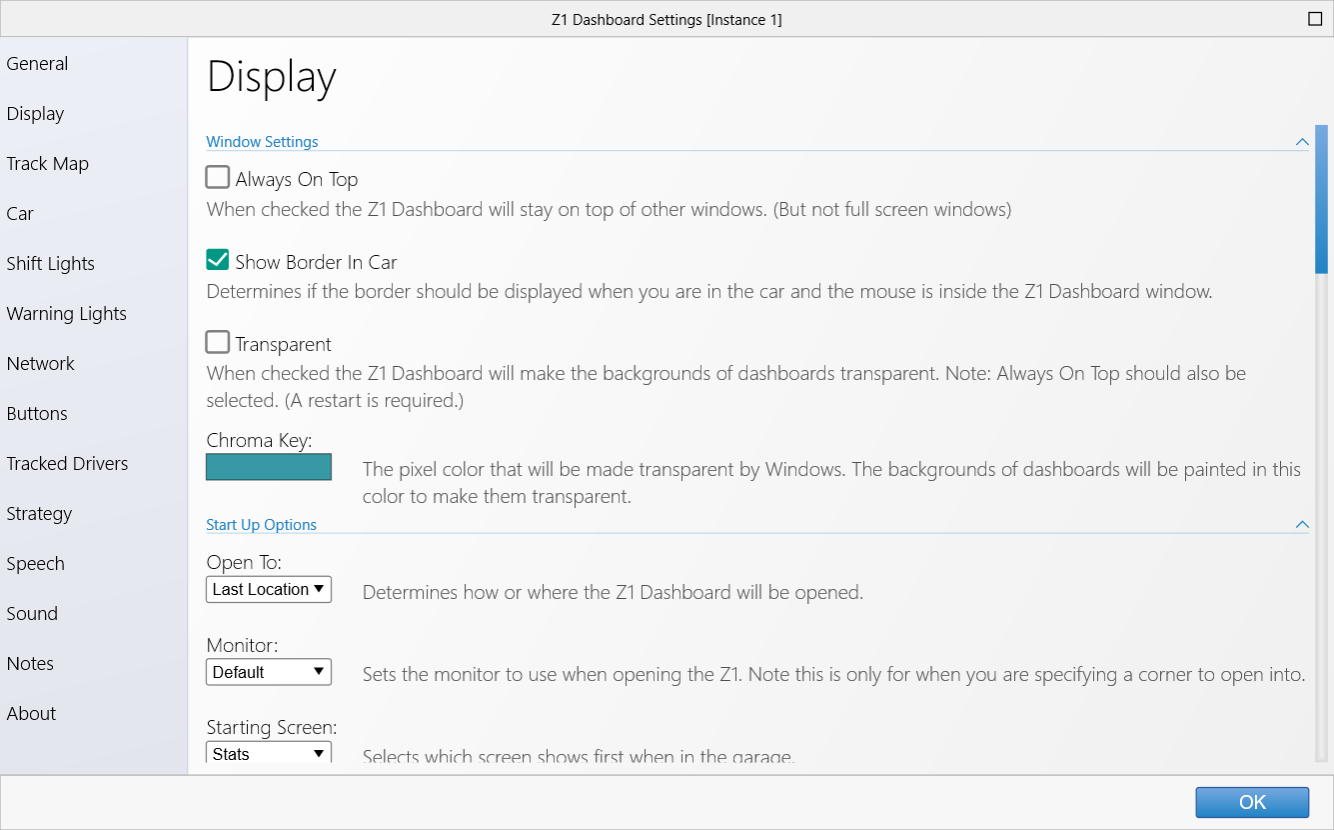 Always On Top:
With this option checked the Z1 Dashboard will remain on top of other windows, like your sim. Your sim must
be run in windowed mode for this to work.
Show Border In Car:
When checked the Z1 Dashboard's window border will be displayed when you are in the car and you
position the mouse over the Z1 Dashboard window. When the mouse is outside of the window then the
border will disappear. Note if the border is not displayed then you will not be able to move the
Dashboard when you are in the car.
Transparent:
Checking this option will make the background of the Z1 Dashboard transparent. This should be used
in conjuntion with 'Always On Top' being turned on. Note a restart is required for changes to this
option to take effect.
Chroma Key:
If the above 'Transparent' option is selected then the background is painted in the color specified
here. Windows will make that color transparent. If your dashoard is not becoming transparent as
well as you would like, or the color specified here is used in you dashboard then you can change it
to a different color by clicking on the swatch.
Start Up Options
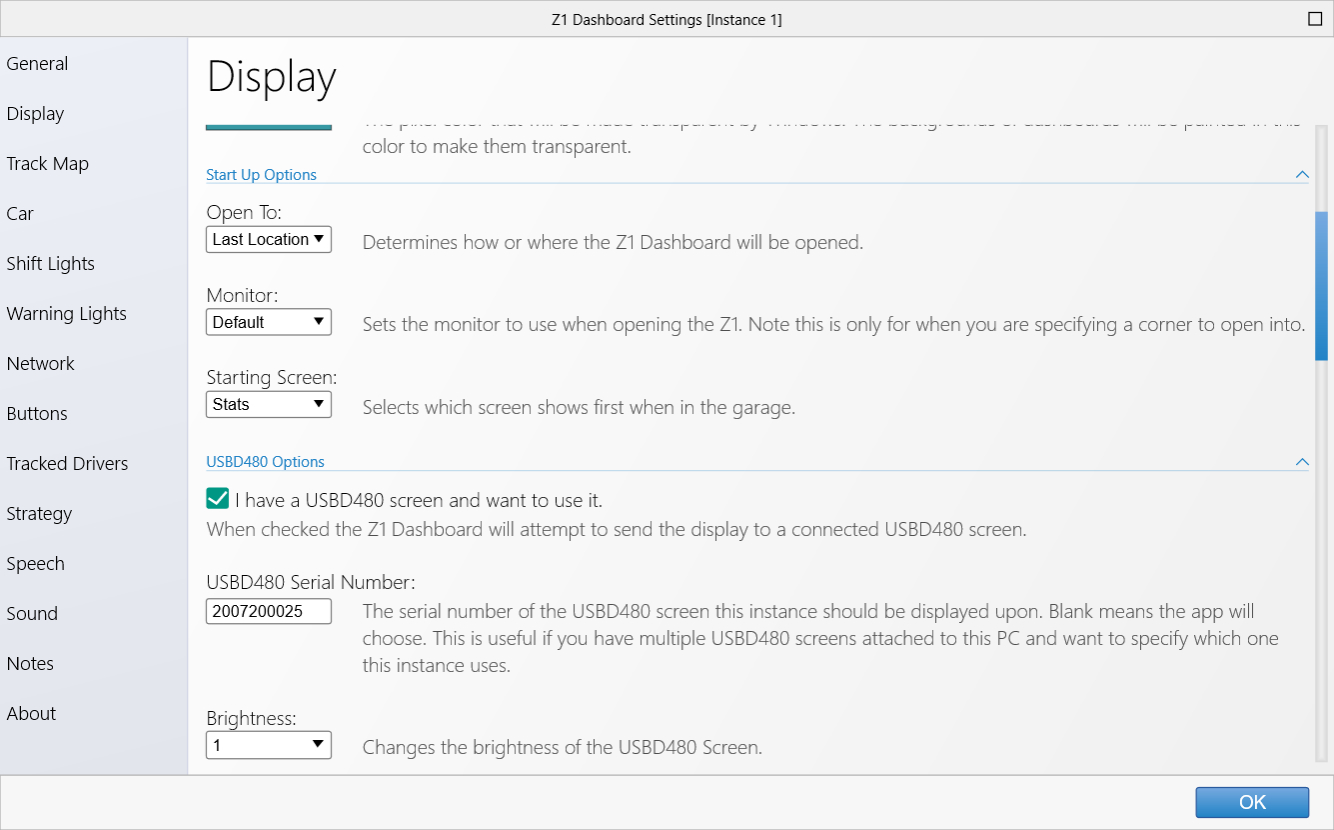 Open To:
This determines how the Z1 window is positioned when it is opened. The options are:
- Last Location - The window will open to the exact location and size it was when you last closed it.
- Maximised - The window will be maximized on startup.
- Top Left - The window will be positioned at the top left of the monitor it was on when it was last closed,
and take up a quarter of the screen.
- Top Right - The window will be positioned at the top right of the monitor it was on when it was last closed,
and take up a quarter of the screen.
- Bottom Left - The window will be positioned at the bottom left of the monitor it was on when it was last closed,
and take up a quarter of the screen.
- Bottom Right - The window will be positioned at the bottom right of the monitor it was on when it was last closed,
and take up a quarter of the screen.
- Top Half - The window will be positioned in the top half of the monitor it was on when it was last closed,
and take up half of the screen.
- Bottom Half - The window will be positioned in the bottom half of the monitor it was on when it was last closed,
and take up half of the screen.
- Left Half - The window will be positioned in the left half of the monitor it was on when it was last closed,
and take up half of the screen.
- Right Half - The window will be positioned in the right half of the monitor it was on when it was last closed,
and take up half of the screen.
- Full Screen - The window will take up the entire monitor, but will not be maximized. This can be useful for
situations where the maximized option causes problems.
Monitor:
This determines which monitor the Z1 Dashboard will open to. The default option lets the Z1 choose the
monitor based on where the application was when it closed, and Windows system settings. Choosing a specific
monitor number forces the application to start on that monitor regardless of where it was previously.
Starting Screen:
This allows you to choose which of six screen options is displayed first when you are not in the car.
Note that for the first 5 options you may still switch to one of the other screens by selecting the
appropriate icon as this only determines which screen is displayed first.
- Stats - This displays the statistics screen first.
- Notes - This displays the notes screen first.
- Laps - This displays the lap times screen first.
- Standings - This displays the standings screen first.
- Track Map - This displays the track map screen first.
- Dashboard - This displays the dashboard even if you are not in the car. This option
can be very useful if you wish to view a specific dashboard when you are not in the car.
Note that if you use this setting then you will not be able to access the other garage
screens once the sim has started. To open the settings dialog once the sim has started,
click the right side of the screen.
USBD480 Options
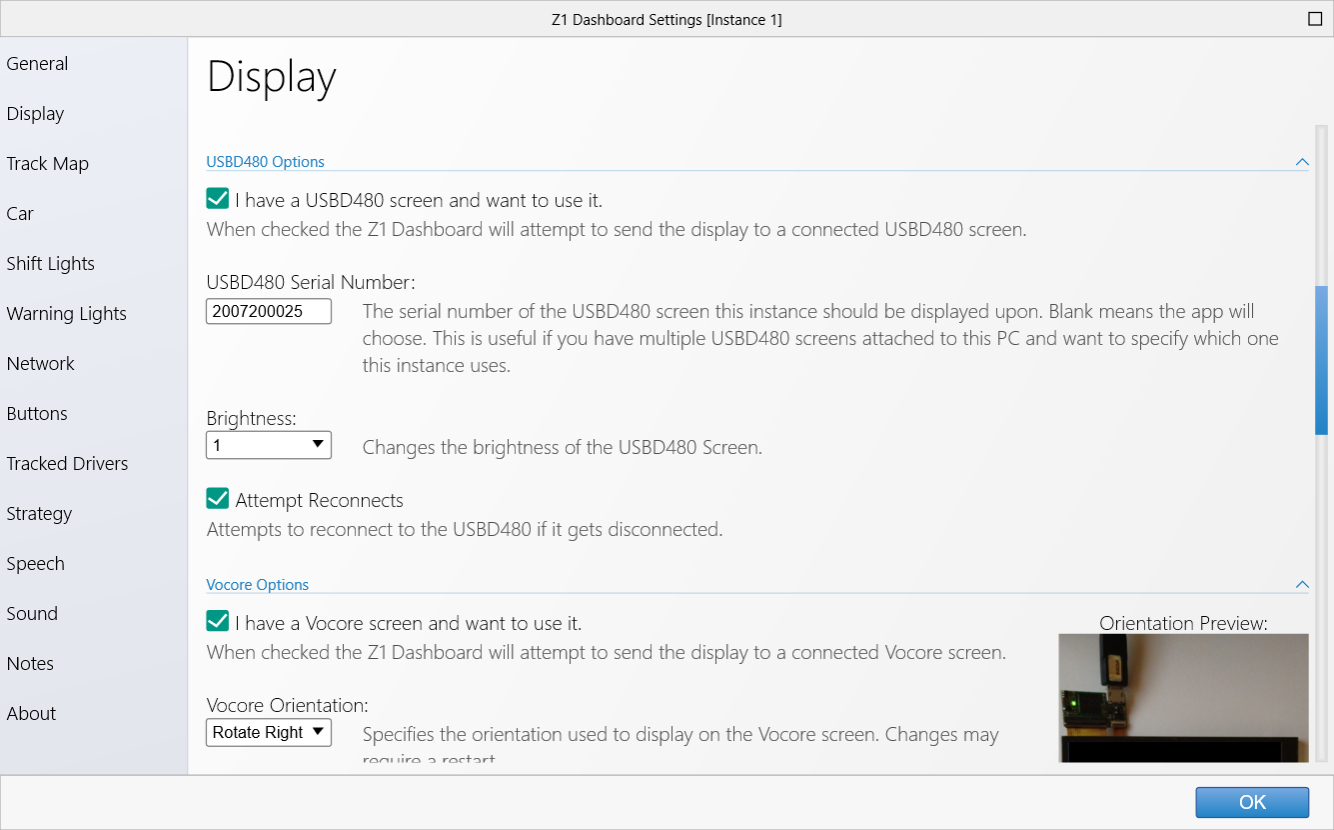 I have a USBD480 screen and want to use it:
When checked the Z1 dashboard will attempt to send the display to a connected USBD480 screen.
USBD480 Serial Number:
This is the serial number of the USBD480 device that this instance should send its dipslay to.
If this is blank then the Z1 Dashboard will choose which screen to send the display to. If you
have multiple USBD480s connected this lets you specify which one this instance is connected to.
Brightness:
This changes the brightness of the USBD480 screen.
Attempt Reconnects:
When checked the Z1 Dashboard will attempt to reconnect to the USBD480 screen if it gets temporarily
disconnected. Note the mosty common reason for a disconnect is a power disruption to the screen
due to not using a powered UDB hub to supply power to the screen. In these cases it is highly
unlikely that the Z1 Dashboard will be able to successfully reconnect/
Vocore Options
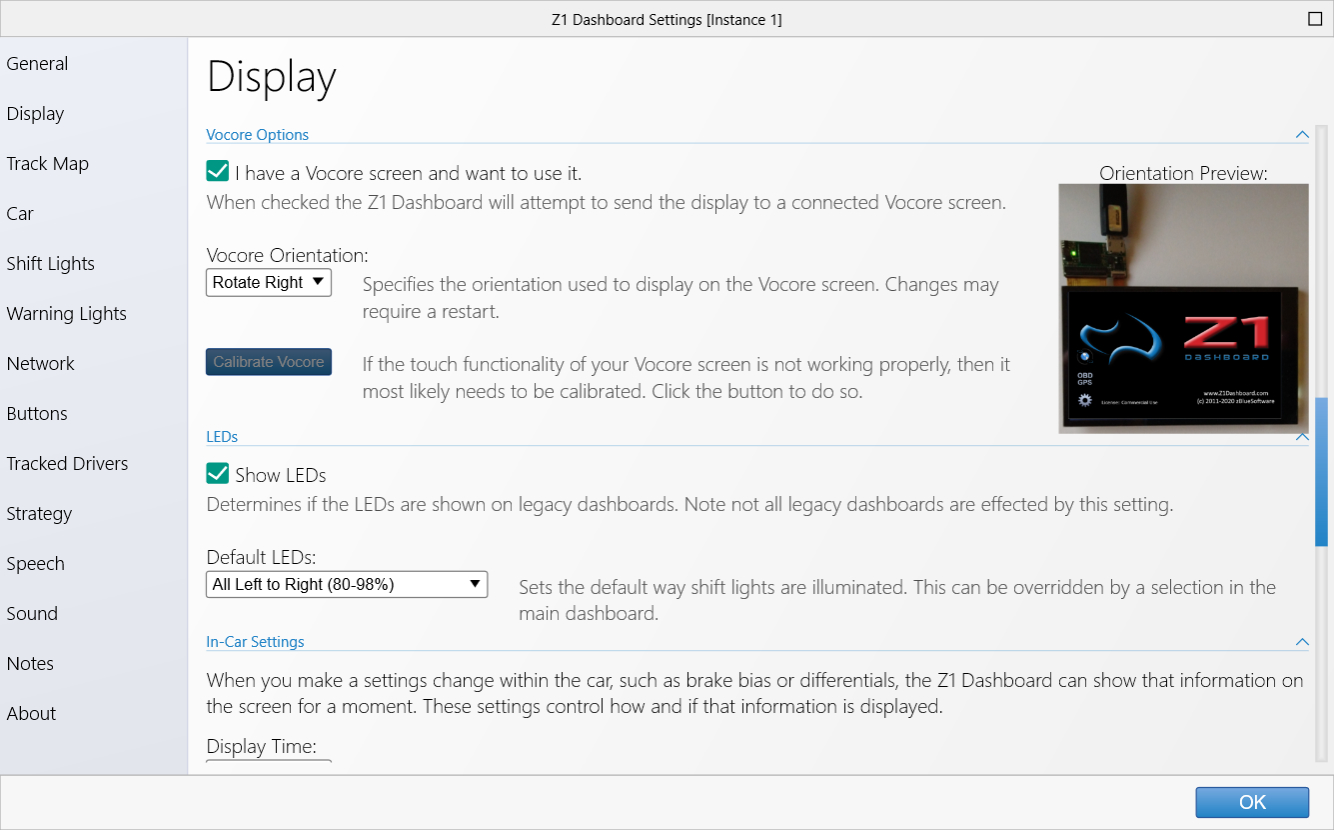 I have a Vocore screen and want to use it:
When checked the Z1 Dashboard will attempt to send the display to a connected Vocore screen.
Vocore Orientation:
This tell the Z1 Dashboard the orientation of your vocore screen. The image to the right provides
a visual image of the orientation. Any changes to this require a restart of the Z1 Dashboard to
take effect.
Calibrate Vocore:
If you have a touch screen on your Vocore then you will need to clibrate it before the Z1 Dashboard
will work properly with it. Click this button to start the calibration process.
LEDs
Show LEDs:
This determines if LEDs are displayed on legacy dashboards. Note not all legacy dashboards are
effecte by this setting.
Default LEDs:
This sets the way shift lights are illuminated. Note this can be overriden on a car-specific basis.
In-Car Settings
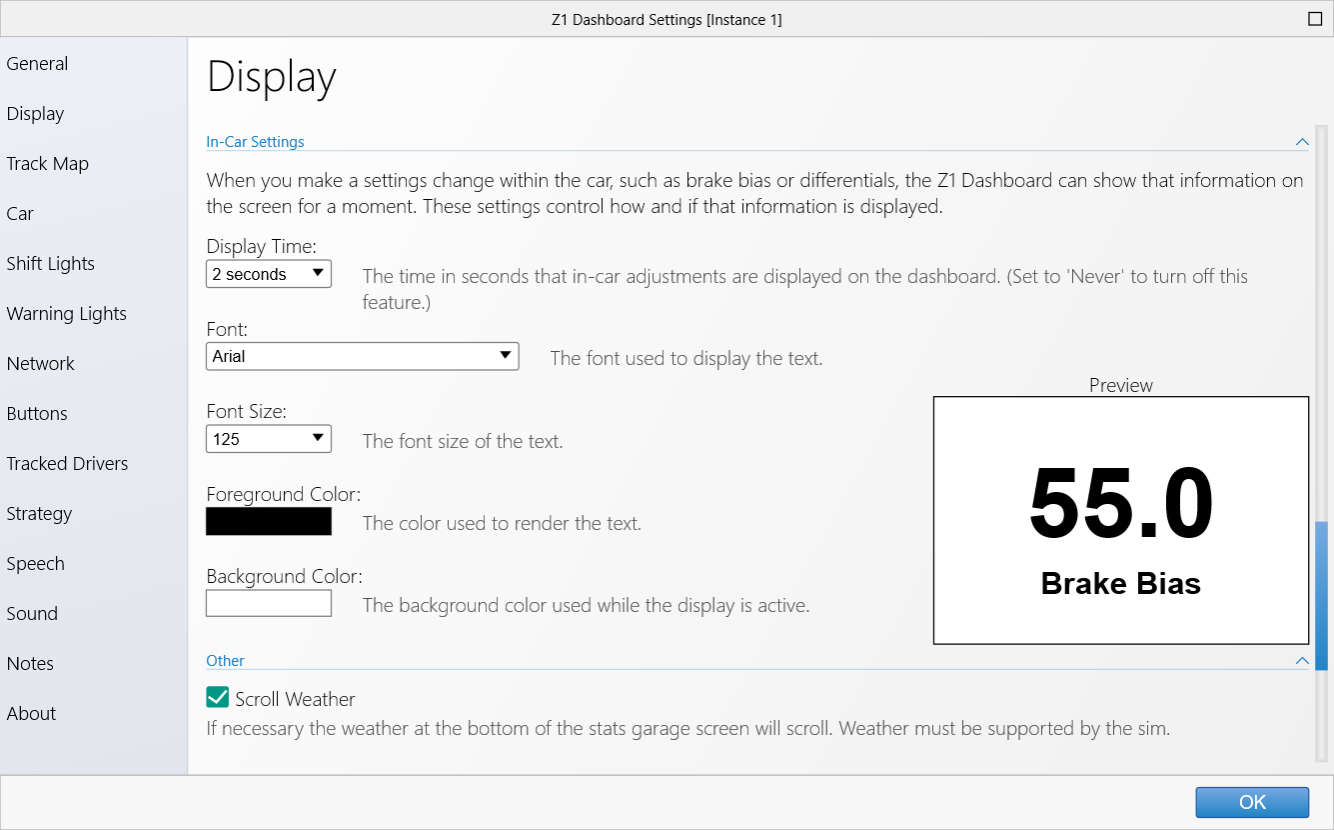
When you make a change within the car, such as brake bias or differentials, the Z1 Dashboard can
show that information on the screen for a moment. These settings control how and if that information
is displayed.
The Preview display on the right of the settings screen shows what the message will look like based
on the current settings.
Display Time:
The time in seconds that in-car adjustments are displayed on the screen. Set the 'Never' to turn
off this feature.
Font:
The font used to display the message text.
Font Size:
The font size used to display the message text.
Foreground Color:
The color used to render the message text.
Background Color:
The background color used while the message is being displayed.
Other
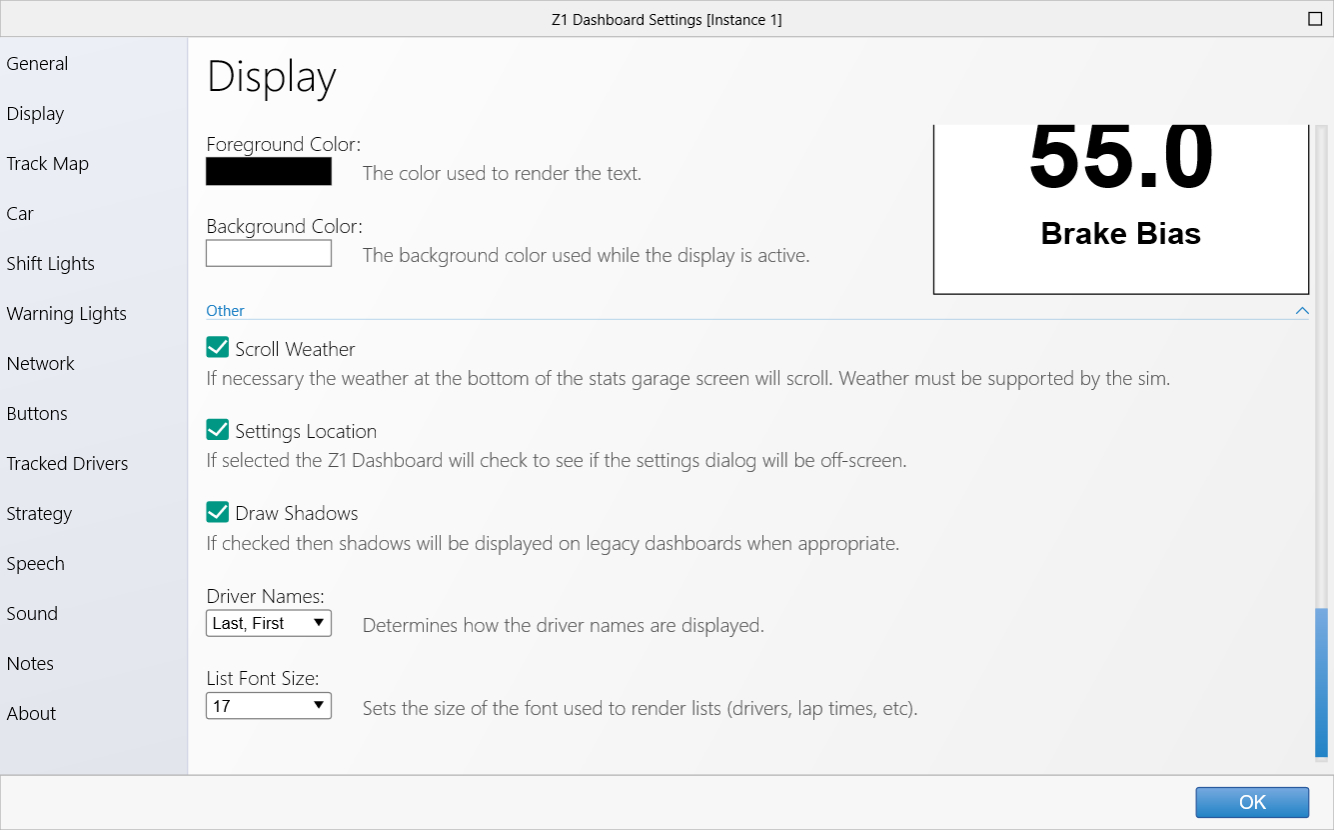 Scroll Weather:
This determines if the weather display at the bottom of the garage screen will scroll when necessary.
Note that not all sims support weather, so even if this option is turned on you may not see any weather
displayed for some sims.
Settings Location:
If selected then the Z1 Dashboard will check to see if the settings dialog will be off-screen.
Draw Shadows:
If checked then shadows will be displayed on the legacy dashboards when appropriate.
Driver Names:
This determines how driver names are dipslayed in standings and track map dashboards.
List Font Size:
This sets the font size used to render lists (drivers, lap times, etc) in the garage screens
and legacy dashboards.
 Manual Index