The Z1 Dashboard software allows you to easily customize the display to suit your style. This customization is done using
the Settings Dialog, accessible by clicking the Settings Icon

while not connected to a sim, or by selecting 'Settings' from the menu when not in the car. Note that each instance of the
Z1 Dashboard software can have different settings. Changing settings for a particular instance only effects that instance.
The settings dialog contains several tabs with specific settings under each one. This page describes the Car tab.
Car Details
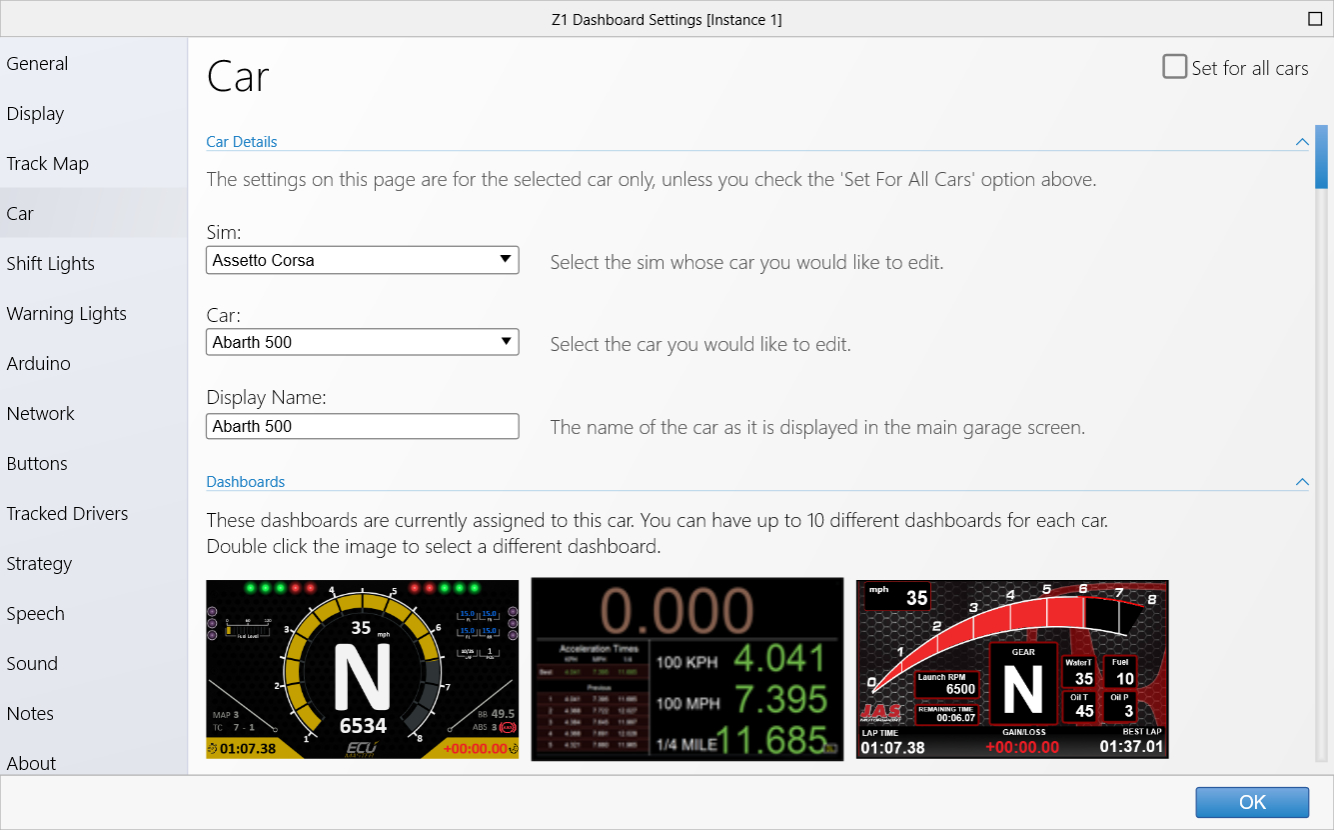 Set For All Cars:
By default the settings on this page only effect the currently selected car. You can have different
settings for every car in every sim.
If you select this checkbox then when you save the current car definition, by clicking the OK button,
the definition will be saved for all cars in the currently selected sim, including the default dashboard.
This allows you to very easily make a specific dashboard layout and assign it to all cars. Note that if
you do this it will overwrite all other car definitions for the sim.
Sim:
This is the name of the sim whose cars you want to edit. This will automatically be set to the currently
connected sim. If the Dahsboard is not connected to a sim, then you will have to choose the appropriate
one from the list.
Car:
This is the car that you want to edit. Like the sim drop down, this will automatically be set the the
currently selected car in the current sim. If the Dashboard is not connected to a sim, or no car is
selected in the current sim, then you will have to choose the car from this list. The list only shows
cars that are available in the currently selected sim.
Display Name:
This is the name of the car as it should be displayed in the garage screen.
Dashboards
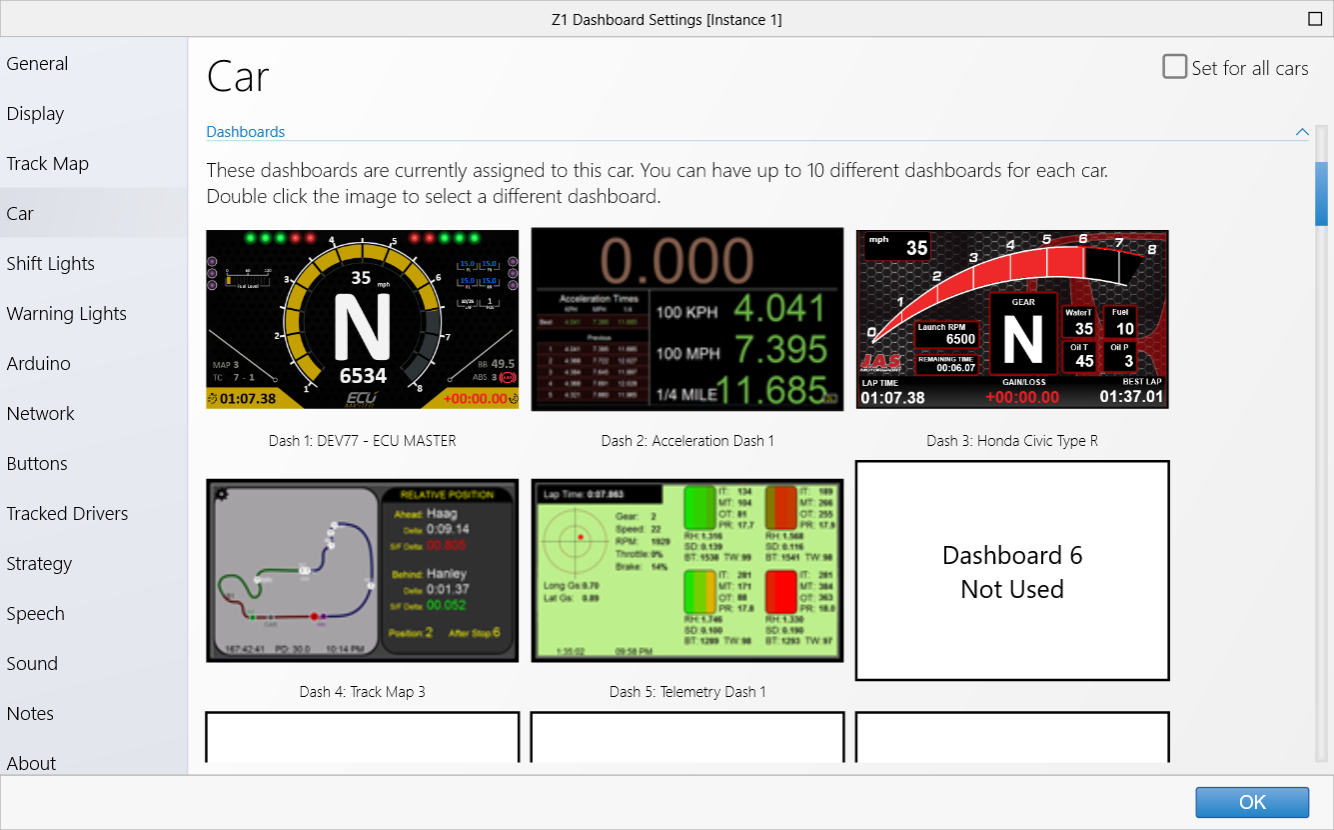
This section displays the current dashboards for the car. Each car can have up to 10 different dashboards.
There are 10 dashboard slots displayed here. You can perform the following actions on each slot:
Double-click: This opens the Dashboard Gallery where you can choose a dashboard to place in the slot.
Control-Click: This will delete the dashboard from the slot. All dashboards to the right will be reordered
to fill in the removed dashboard's spot.
Mouse-drag: You can click and drag a dashboard from one slot to another. This makes it very easy to
reorder the dashboards.
Pit Limiter
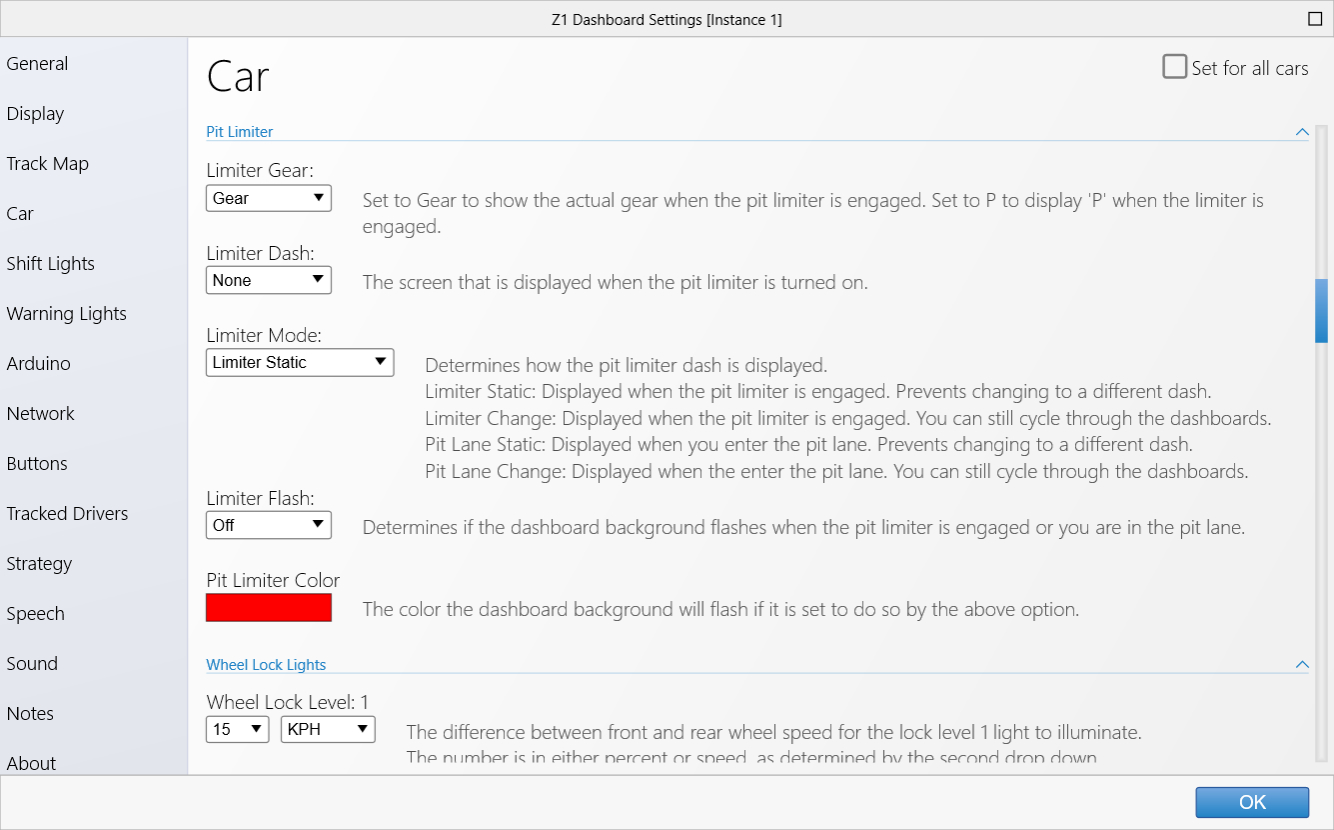 Limiter Gear:
This allows you to specify how the gear indicator should display information when the pit limiter is
engaged. The options are 'P' or 'Gear'. The 'P' setting will display a P when the pit limiter is engaged
regardless of the gear you are in. The 'Gear' option will display the actual gear you are in when the
limiter is engaged.
Limiter Dash:
This indicates which of the dashboards associated with this car will be displayed when the pit limiter
is engaged. Selecting 'None' means that engaging the pit limiter will not select a specific dashboard.
Limiter Mode:
This determines when the selected pit limiter dash is displayed. There are four options:
1)
Limiter Static - This is the default. The pit limiter dash will be displayed when the pit
limiter is engaged. When the pit limiter is turned off the dash will return to the dash displayed before
the limiter was engaged.
2)
Limiter Change - The pit limiter dash will be displayed when you engage the pit limiter. You
may then change the dash to a different one at any point. Turning off the pit limiter does not restore
the original dash.
3)
Pit Lane Static - This pit limiter dash will be displayed when you enter pit lane. When you
exit pit lane the dash will return to the dash displayed before you entered pit lane.
4)
Pit Lane Change - The pit limiter dash will be displayed when you enter pit lane. You may
then change the dash to a different one at any point. Leaving the pit lane does not restore the original
dash.
Limiter Flash:
This determines if the dashboard background flashes when the pit limiter is engaged or you are in the
pit lane.
Pit Limiter Color:
This is the color the dashboard background will flash if it is set to do so by the above option. Clicking
the swatch lets you change the color.
Wheel Lock Lights
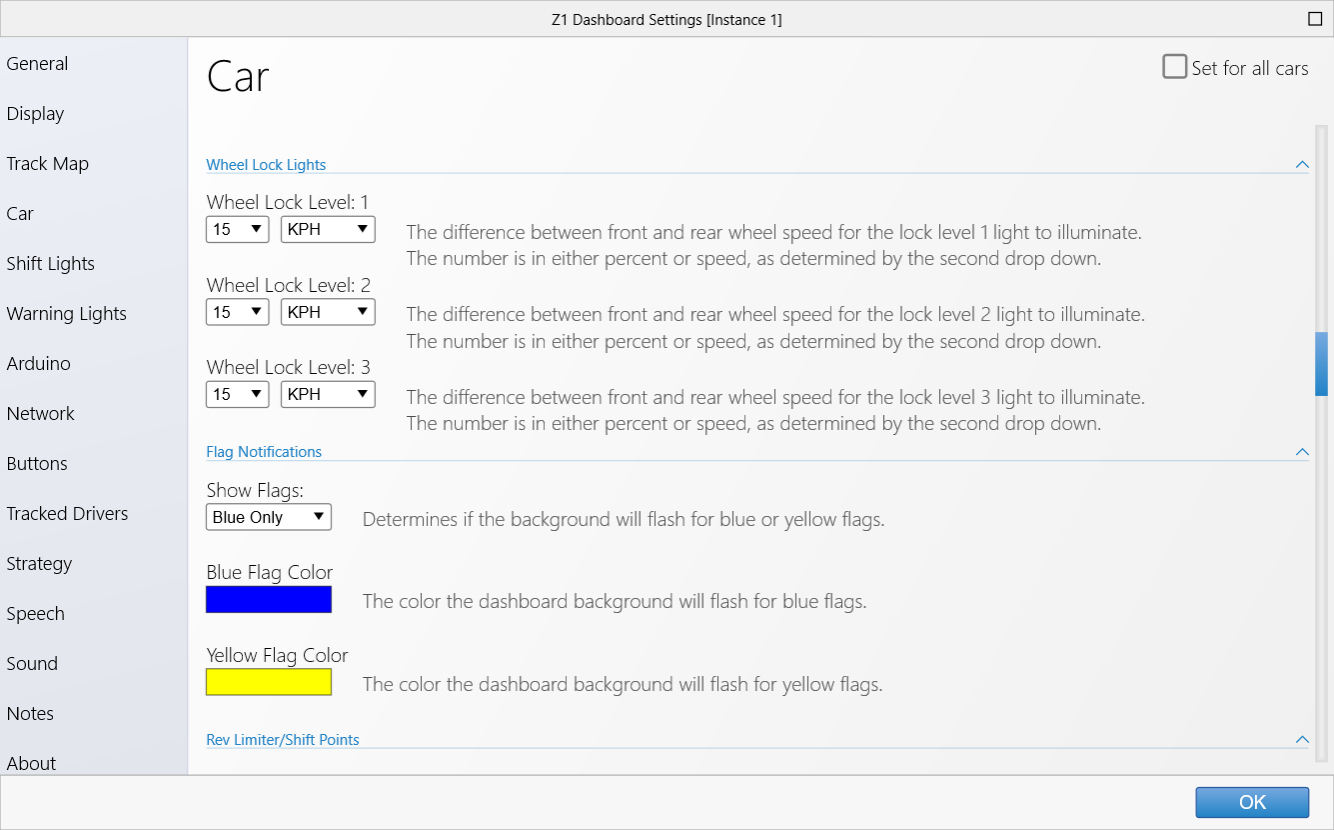
Wheel lock lights are LEDs that illuminate when the front wheels are about to lockup. These LEDs can be
specified as a left or right warning LED in the Warnings Lights tab. Or they can be the left/right 3 LEDs
on external LED strips. Note that the sim must provide wheel speed data for this feature to work.
There are three lock levels. Ideally you would set lock level 1 to be the least senstive, and lock level
3 to be the most sensitive. This will make them turn on in order as you get closer to locking the wheels.
This means that lock level 1 would be set to a smaller number than lock level 2, which in turn would be
set to a smaller number than lock level 3.
Each lock level can represent a difference in either percent or in speed between the front and rear wheels.
Flag Notifications
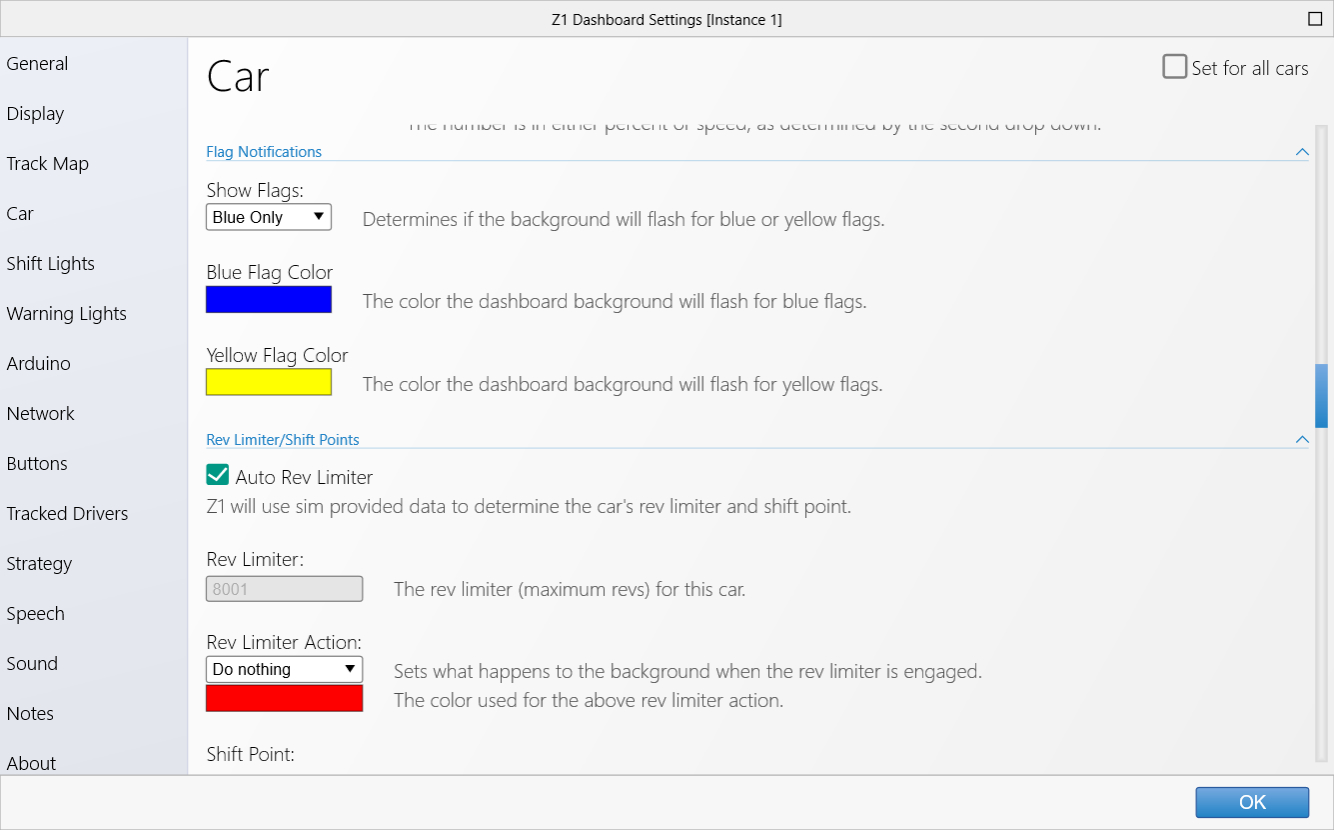 Show Flags:
This determines if the background will flash for blue or yellow flags.
Blue Flag Color:
This is the color the dashboard will flash for blue flags. Click the swatch to change the color.
Yellow Flag Color:
This is the color the dashboard will flash for yellow flags. Click the swatch to change the color.
Rev Limiter/Shift Points
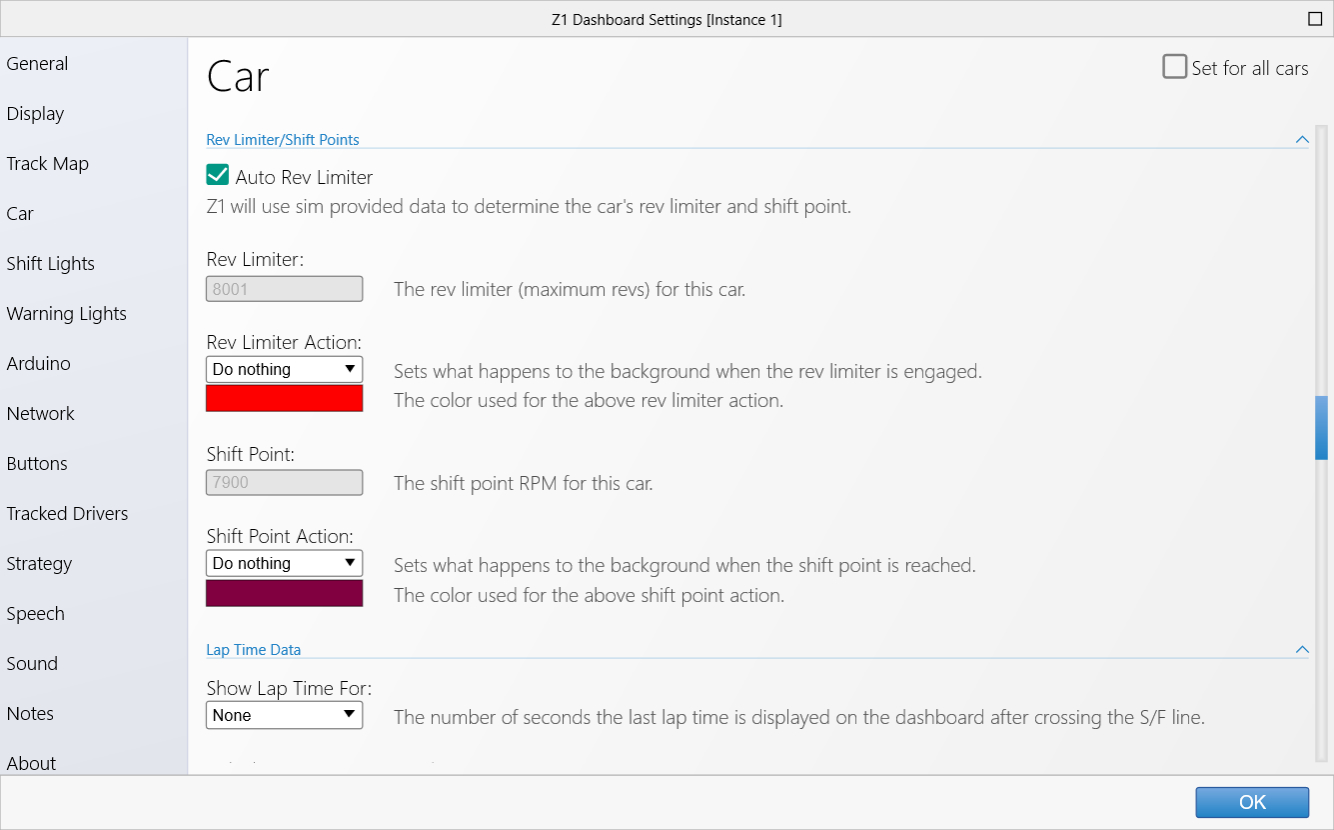 Auto Rev Limiter:
If this option is selected then the Z1 Dashboard will use data provided by the sim to set the car's rev
limiter and shift point.
Rev Limiter:
This is the RPM at which the rev limiter is engaged for the car. If you want to set this manually you must
uncheck the Auto Rev Limiter option above.
Rev Limiter Action:
This sets what happens to the dashboard background when the rev limiter is engaged.
If the dashboard background is set to flash when the rev limiter is engaged, then the swatch indicates
the color it will flash. Click the swatch top change the color.
Shift Point:
This is the RPM at which the shift point has been reached for the car. If you want to set this manually
you must uncheck the Auto Rev Limiter option above.
Shift Point Action:
This sets what happens to the dashboard background when the shift point is reached.
If the dashboard background is set to flash when the shift point is reached then the swatch indicates
the color it will flash. Click the swatch top change the color.
Lap Time Data
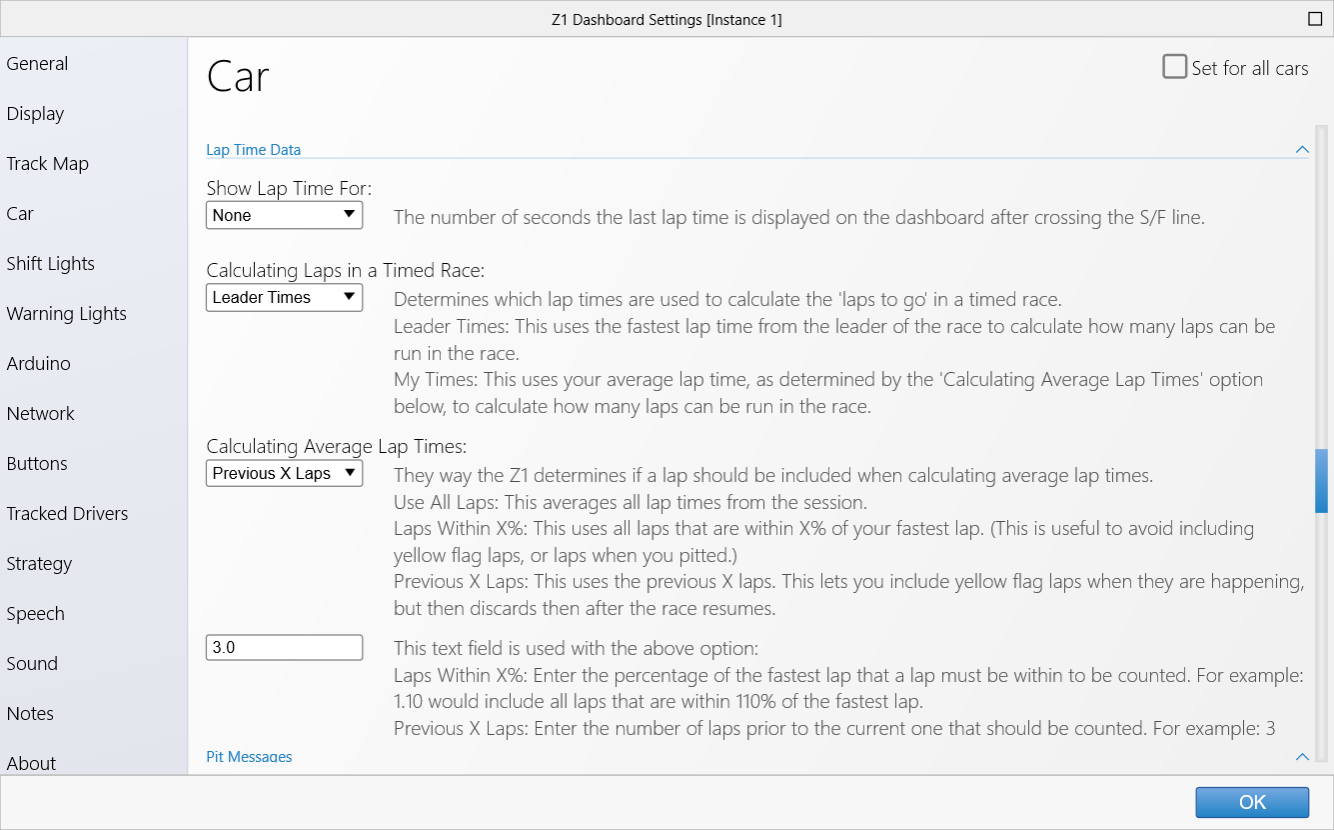 Show Lap Time For:
This is the number of seconds the last lap time iss displayed on the dashboard after crossing the start/finish
line.
Calculating Laps in a Times Race:
This option allows you to specify how the number of laps remaining in a timed race are calculated. The
two options are Leader Times and My Times. Most of the time you should use Leader Times. This uses the
leader's lap times to determine the number of laps remaining in the race. Because they are faster than
you (unless you are the leader) they may be able to do more one more lap than you will be able to do in
the time remaining. This means you will also have to complete that additional lap, and this will impact
fuel consumption.
Calculating Average Lap Times:
This tells the software which laps to use when calculating average lap times. This is useful for timed
races in order to determine the number of laps remaining in the race. Note there are certain conditions
that can cause inaccuracies during a race, such as running under yellow flags or pit stops, etc.
You therefore have three options:
1)
Use All Laps - this is the default. It uses all laps to determine your average lap time.
2)
Laps Within X% - This option only includes those laps that are within X% of the average lap
time. This will allow you to not include yellow laps or pit laps (or other unusually slow laps). The
first three laps of the race are used to determine a base average lap time.
3)
Previous X Laps - This option tells the software to determine the average lap time based
on the previous X laps. This is useful if you want to include yellow flag periods in your average lap
times when they are running, but then want to discard them when you go back to green flag running.
Text Field:
This text field is used with the above option.
Laps Within X%: Enter the percentage of the average lap time that a lap must be within to be
counted. For example 1.10 would include all laps that are within 110% of the average lap time.
Previous X Laps: Enter the number of lap prior to the current one that should be counted. For
example 3 would include the previous 3 laps.
Pit Messages
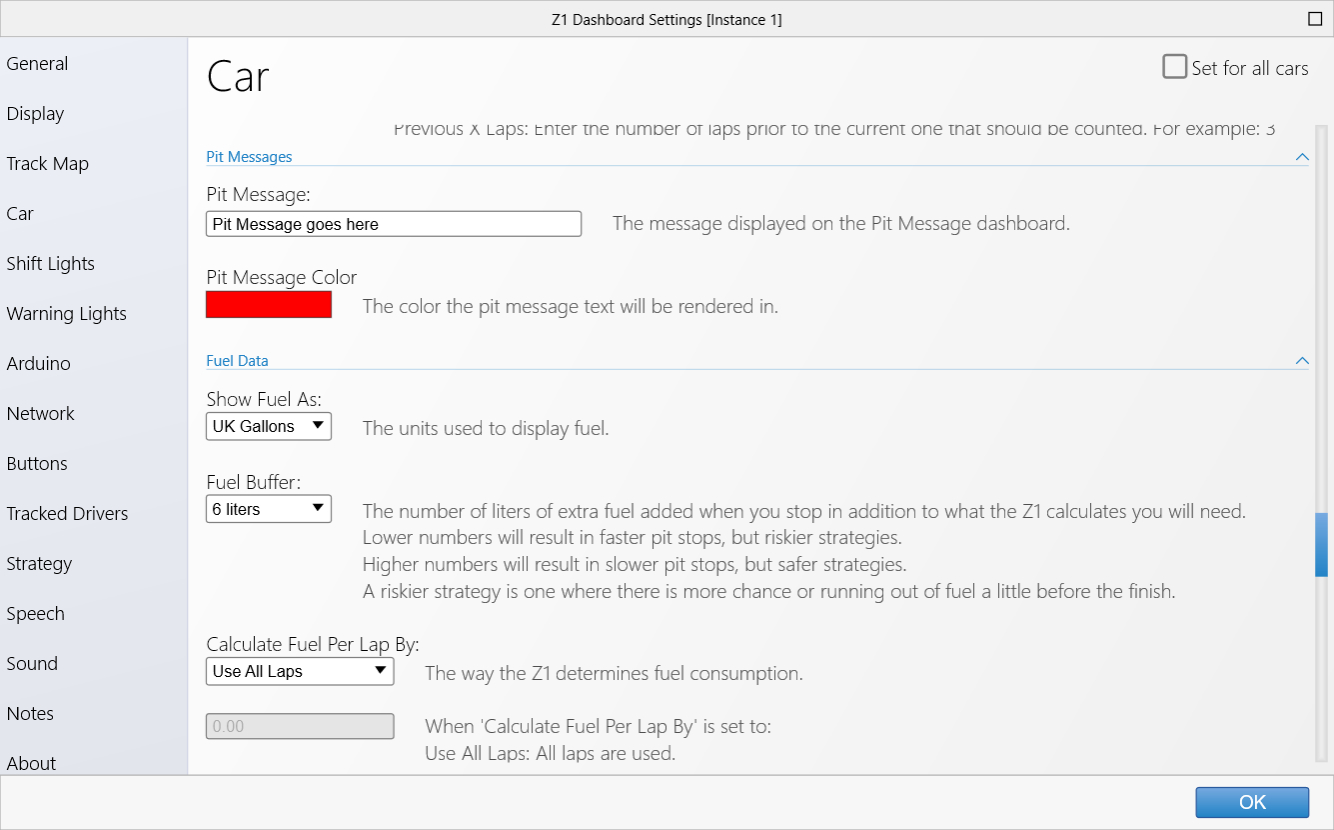 Pit Message:
This is the message that will be displayed in the pit info dashboard if it is used.
Pit Message Color:
This is the foreground color of the message that is displayed in the pit info dashboard. Clicking
the swatch will display a color chooser which allows you to select the desired color.
Fuel Data
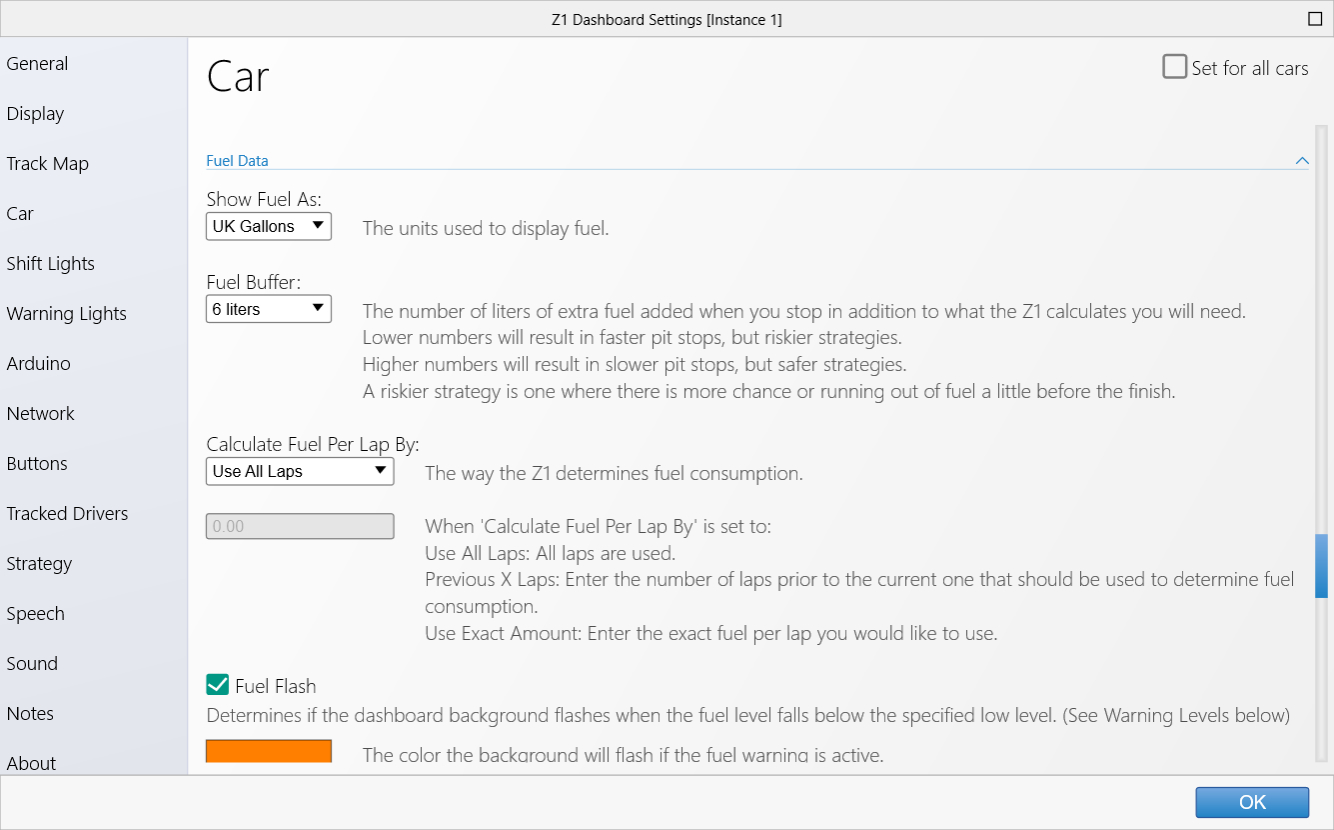 Show Fuel As:
This determines how fuel for this car will be displayed. By default this option is inherited from the
global Fuel Units settin in the General tab. However if you want to have this car to display fuel using
different units you can specify that here.
Fuel Buffer:
This is the number of liters of extra fuel that will be added when you stop in addition to what the Z1
calculates you will need.
Lower numbers will result in faster pit stop, but riskier strategies.
Higher numbers will result in slower pit stops, but safer strategies.
A riskier strategy is one where there is more chance of running out of fuel a little before the finish.
Calculate Fuel Per Lap:
By default the Z1 Dashboard software will calculate the amount of fuel used per lap by averaging all laps.
However that can sometimes cause inaccuracies, especially if you are under a long full course caution.
You therefore have three options:
1)
Use All Laps - This is the default option. It uses all laps to determine the amount of fuel
used per lap.
2)
Previous X Laps - This uses the previous X laps to determine the average fuel consumption.
You specify the number of laps in the text field as a while number (ie 5 to use the last five laps).
3)
Use Exact Amount - Enter any number in the text field and the software will use that exact
amount of fuel for the average amount per lap. This number should be in the same units as those displayed
by the car. For example setting it to 2.5, when you use liters as the fuel display, will mean the
software will calculate fuel usage based on you using 2.5 liters per lap.
Fuel Flash:
Determines if the dashboard background will flash when the fuel level falls below the specified low fuel
level. (See Warnings Levels below.)
The color swatch determines what color the background will flash. Click the swatch to change the color.
Auto Fuel Density:
This determines if the Z1 Dashboard should set the fuel density based on data provided by the sim.
Fuel density is used when converting between liters and kilograms/pounds.
Fuel Density:
This is the density of the fuel in kilograms per liter. To manually edit this value the Auto Fuel Density
option must be turned off.
Warning Levels
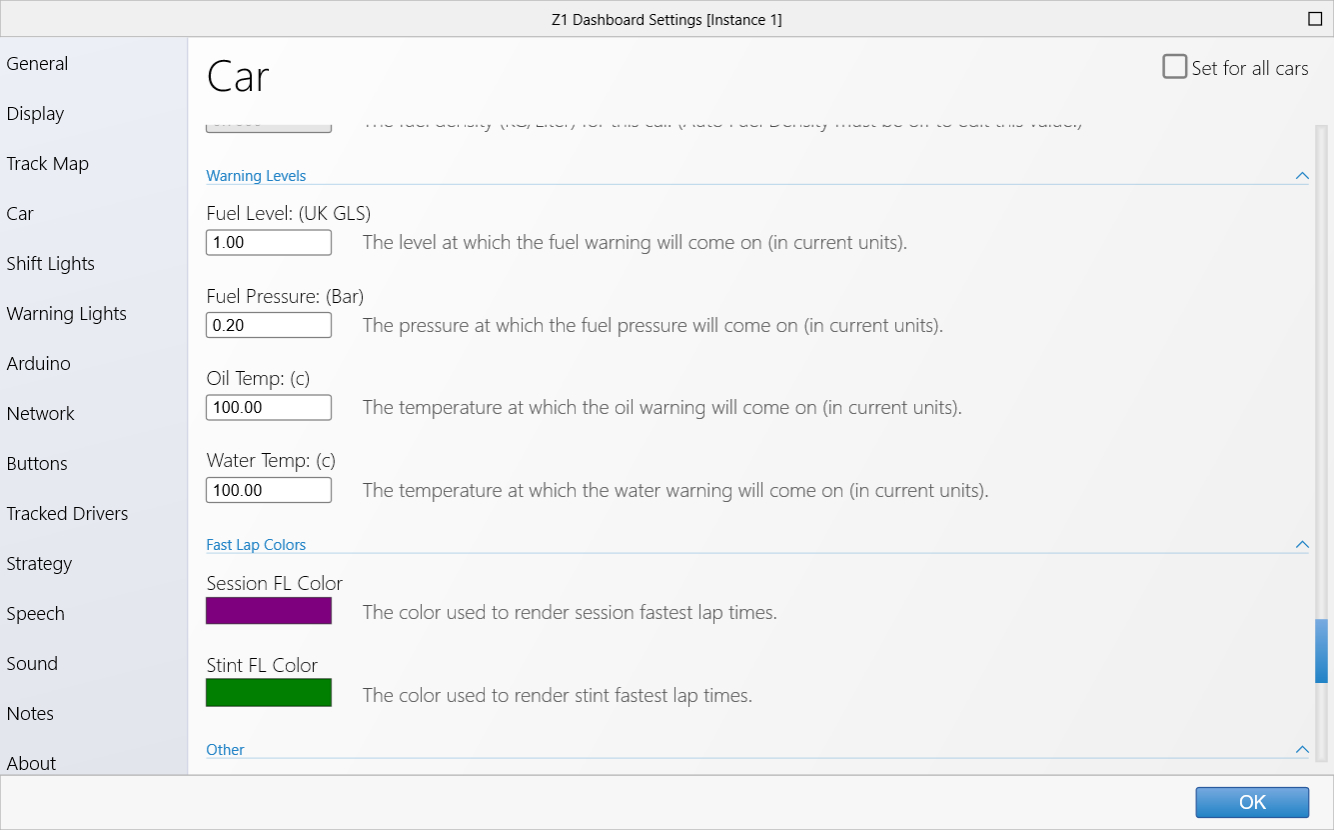 Fuel Level:
This is the level under which the fuel level warning will come on, in current units.
Fuel Pressure:
This is the pressure under which the fuel pressure will come on, in current units.
Oil Temp:
This is the temperature over which the oil temperature wanring will come on, in current units.
Water Temp:
This is the temperature over which the water temperature warning will come on, in current units.
Water Pressure:
This is the pressure under which the water pressure warning will come on, in current units.
Fast Lap Colors
 Session Fast Lap Color:
This is the color that is used to display the lap time on the dashboard when it is your fastest session
time. Clicking the swatch will display a color chooser which allows you to select the desired color.
Stint Fast Lap Color:
This is the color that is used to display the lap time on the dashboard when it is your fastest stint
time. Clicking the swatch will display a color chooser which allows you to select the desired color.
Other
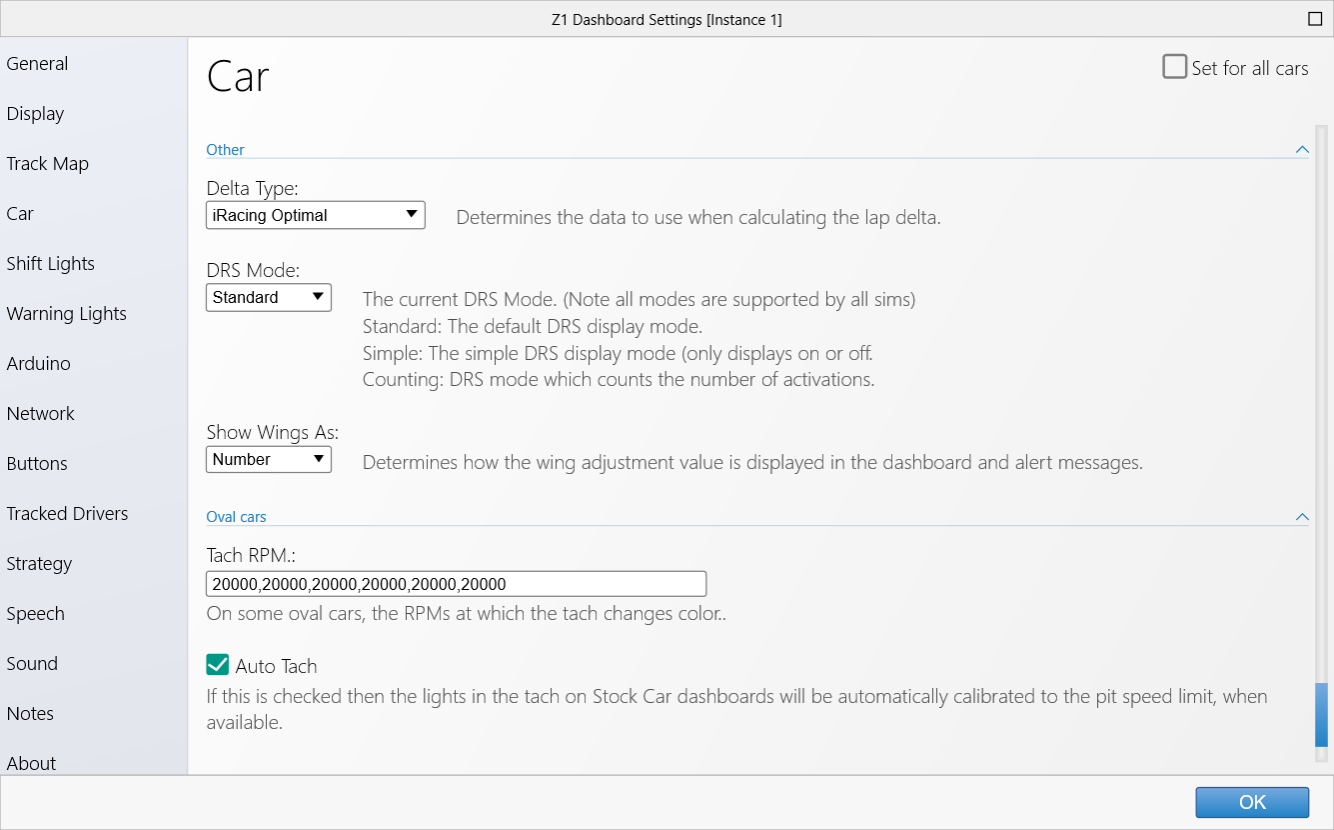 Delta Type:
By default the Z1 Dashboard software will calculate the the delta using its own data. This allows
for accurate deltas in all of the sims. However some sims offer their own delta timing options.
You can specify that one of these should be used by the Z1 Dashboard when running the sim.
To do so, just select the desired option from the drop down.
DRS Mode:
The current DRS mode. (Note not all modes are supported by all sims.)
Standard: The defauklt DRS display mode (display when DRS is available, when you are in the DRS
zone, and when it is activated.)
Simple: The simple DRS display mode( only displays DRS is on or off)
Counting: DRS mode which counts the number of activations.
Show Wing As:
This determines how the wind adjustment of some dirt track cars is displayed in the dashboard and alert
messages.
Oval cars:
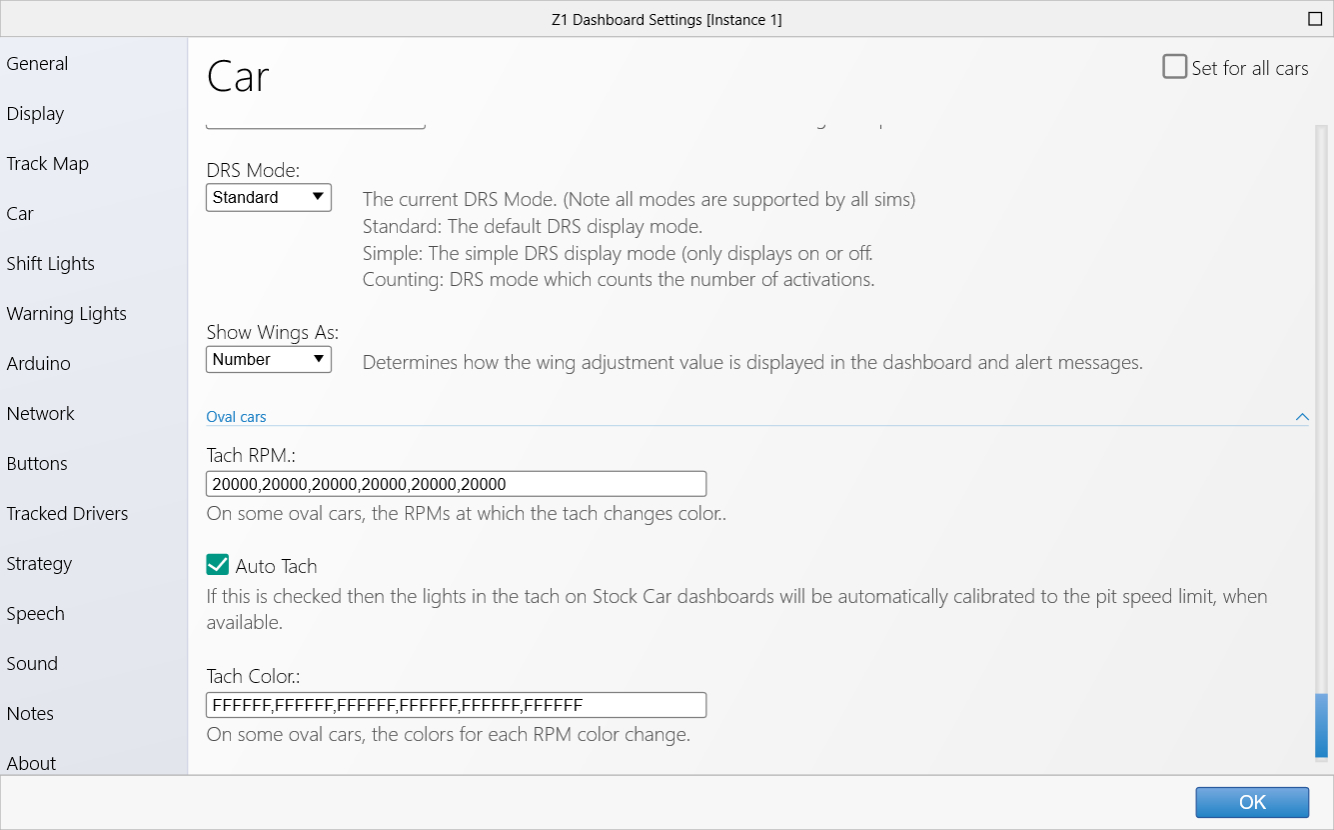
These settings are used with some legacy stock car dashboards.
Tach RPM:
On the oval cars with tachs that can change colors, these values specify the RPMs at which the tach
changes to the next color. It is a comma separated list of RPM levels.
Auto Tach:
If this checkbox is ticked then the lights on the tach on legacy Stock Car dashboards will be automatically
calibrated to the pit speed limit, when available.
Tach Color:
On some legacy oval cars with tachs that can change colors, these values specify the color for each
RPM range. There are five RPM ranges, and as such this is a comma separated list of those five colors
in hex format.
 Manual Index